Showing posts with label Recipe. Show all posts

Tuesday, February 1, 2011

Soup dreams


A blizzard is whipping the house, it's effectively 4 degrees below zero outside with the wind chill, and the family and I are relaxing. We don't have to be on the roads, and there's plenty of food to keep us fed for a couple weeks.

Not so long ago I was one of those people who rushed to the supermarket the day before a major storm (or even after the deluge of flakes started) to grab what I could for the next couple of days.

Since then, I've learned to keep some staples in the kitchen, not because Mother Nature might trap me at home but because having a full pantry makes life easier. (And, yes, when a storm blasts in, I don't have to rush to the supermarket to scavenge supplies.)

When I'm not inspired to make anything particular or I haven't had time to do my regular shopping I can still have a good meal. Sometimes it's a burrito stuffed with beans, rice and leftover meat or vegetables; sometimes it's a pasta salad bright with lemon vinaigrette and roasted red peppers; sometimes it's soup. Homemade soup tastes better than the stuff sold in cans, and even a non-cook can make it pretty easily. A bonus is it's more healthful.

Just yesterday the U.S. Department of Agriculture and Department of Health and Human Services announced the new Dietary Guidelines for Americans, saying that we as a nation need to eat fewer calories, less salt, less added sugars, and more vegetables, fruits and whole grains. When it comes to salt, processed foods, especially most ready-to-eat soups, are big offenders.

Not only do most canned soups contain a lot of sodium per serving, the serving size printed in small type on the back of the can doesn't reflect what people normally consume. For instance, those microwavable bowl-like containers of soup that people take to work look like a single serving. One "bowl," one serving, right? Nope. But who eats just half or shares the bowl with a co-worker? So when figuring the amount of sodium you get from one of those, you may as well double the number on the label, which means you've consumed more than 800 milligrams in a low-sodium soup, or more than 1500 milligrams in a bowl of regular soup, exceeding some people's recommended maximum for an entire day under the USDA guidelines.

You can control the salt.
Make your own soup instead.

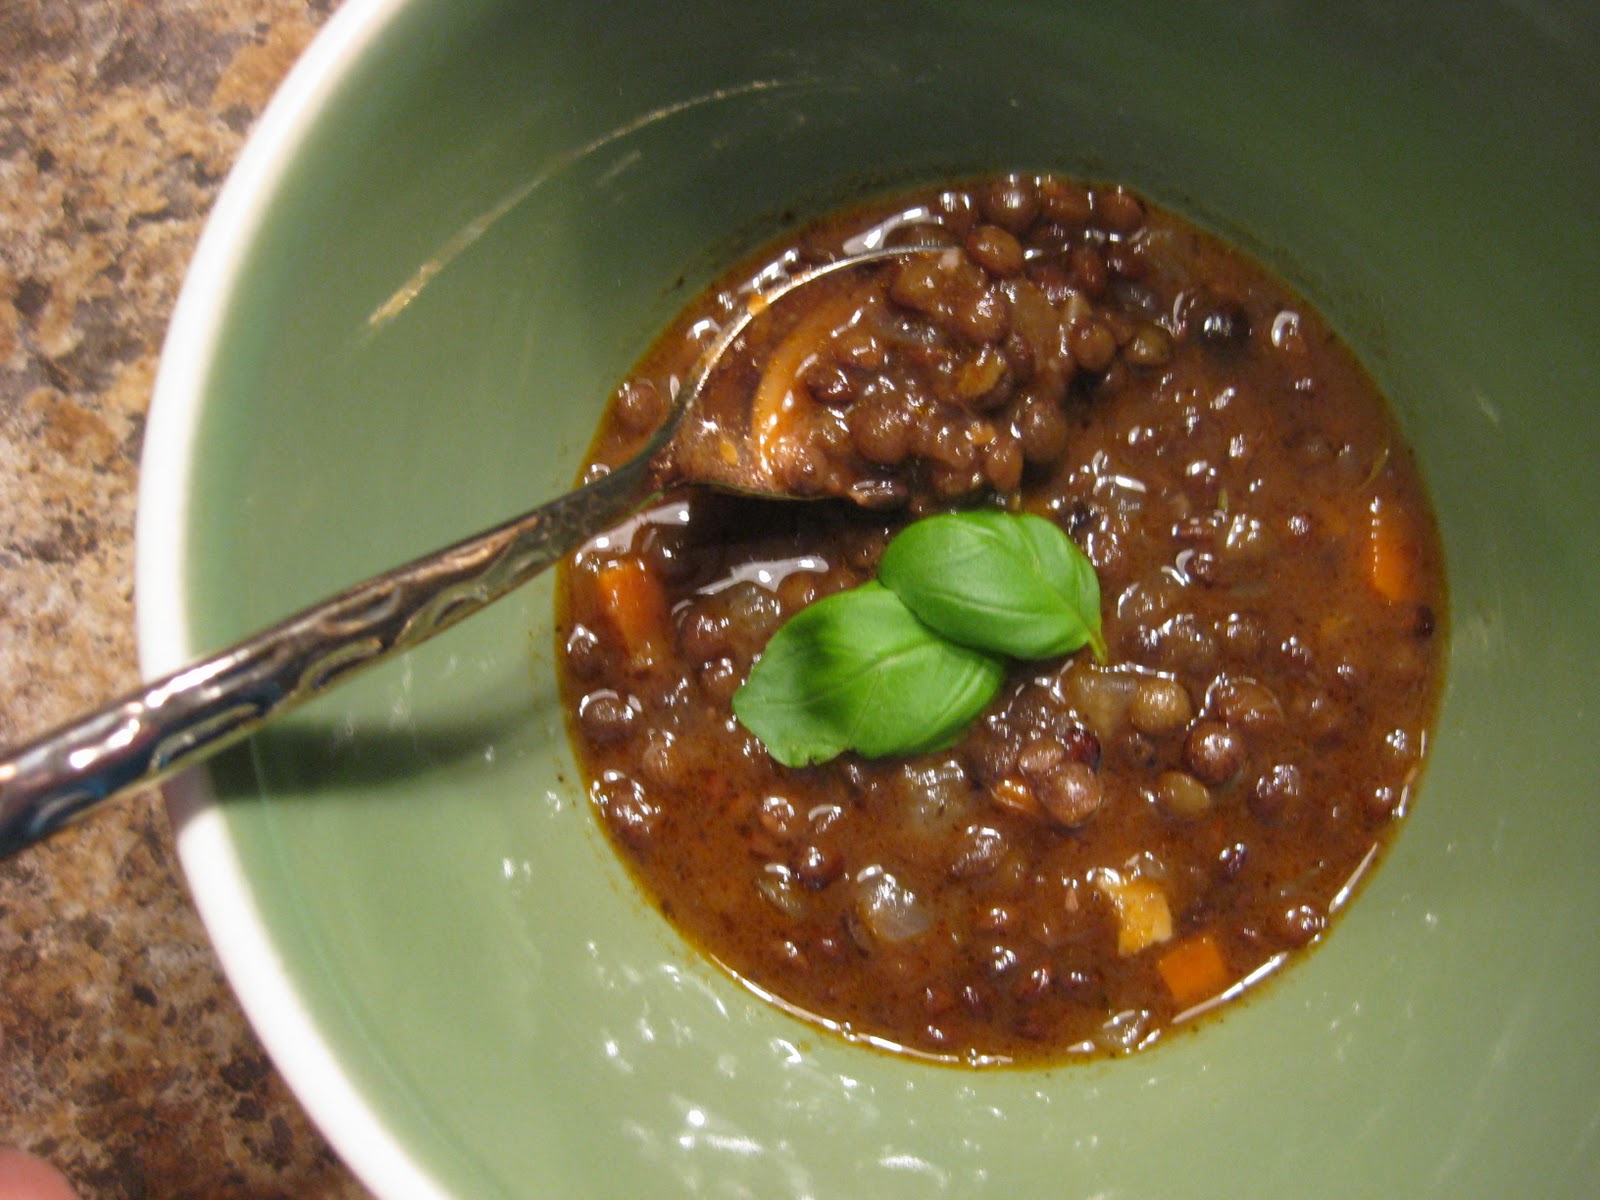
Last night, we had lentil soup (very similar to my lentil stew) with braised lamb shanks, which give a wonderful flavor to the soup. If I weren't using the lamb shanks, I'd probably brown some sausage (merguez or chorizo would work), good bacon or pancetta and use that as the meat component. Or you could skip the meat and use vegetable stock in place of water. Except for the lamb, all the ingredients are things I keep on hand.

Among the things I nearly always have: dried split peas and lentils (green and red), canned and dried beans, noodles, rice, all-purpose flour, canned fish (sardines, tuna and wild red salmon), canned tomatoes, canned coconut milk, peanut butter, chicken or vegetable stock, frozen vegetables, fresh carrots, potatoes, onions, shallots, scallions, ginger root, lemon or lime, and, of course, soy sauce, olive oil, butter and some vinegar. What kinds of pantry staples do you keep around? Or what do you like to make when the weather outside is frightful?

Lentil Soup With Braised Lamb Shanks Recipe
Serves 4

INGREDIENTS
2 Tablespoons butter
2 lamb shanks

one medium onion, chopped
1 stalk celery, chopped
1 carrot, chopped
2 cloves garlic, smashed
1/2 teaspoon dried thyme

1/2 cup good red wine
4 cups water
1/2 cup to 1 cup tomato sauce (I use leftover sauce, but you can use canned chopped tomatoes or tomato puree and add some of your own oregano or basil, etc. if you want)

1 cup French green lentils* (about 8 ounces, or half a pound), picked through and rinsed

4 lemon wedges, to squeeze over each bowl, optional

DIRECTIONS

1. Melt butter over medium-high heat in a heavy 4 quart pot or high-sided 12-inch pan (whichever is large enough to hold the shanks). If butter starts to burn, lower heat. Season shanks with salt** and pepper and place in pan, browning on all sides. Don't worry about browning the entire surface perfectly. You just want some browning for flavor. Remove shanks to a plate.

2. With heat on medium to medium low, saute onion, celery and carrot until onion pieces turn translucent. It's okay if edges start to turn golden, but you don't want to burn the vegetables. Stir in garlic and thyme, letting them cook about a minute.

3. Add wine, water and tomato sauce to pan, scraping any brown bits from bottom. Stir in lentils, then return shanks to pan along with any meat juices. Bring soup to boil, then reduce heat to lowest setting, cover and let simmer until lamb is cooked, about an hour and a half.

4. Remove meat from shanks, pull apart or cut into pieces and return to soup. Discard bones. 

NOTE:
*French green lentils tolerate the long cooking time without turning to mush.
**When you salt food, be aware that one half teaspoon contains about 1200 milligrams of sodium. Also keep in mind that some ingredients, such as canned tomatoes or tomato sauce, usually contain added salt.

Monday, January 10, 2011

Braised leeks with lemon vinaigrette


When my husband and I went to Paris (while we were still dating), we went to an old-fashioned little neighborhood restaurant that we had found. I don't remember how we found it, but we had heard that the former prime minister liked the place and we wanted to check it out.

Since we were in the neighborhood, and it was a weekday and we were early (and presentable) for dinner, I figured we could swing by and see if it was busy. If not, we'd drop in. If it was packed, we'd just call the next day for a table.

Only one of maybe a dozen small tables was occupied, so I asked the host about dinner. "Non, non, non! We have no table for you. You must have a reservation," the older man responded in French, looking at us as though we had tried to crash a royal wedding. My husband and I looked at each other, then over the man's shoulders at one couple and nearly a dozen empty tables.

In New York, we might have walked out and kept going. But it occurred to me that maybe walking in off the street wasn't something a diner did at an old neighborhood restaurant here. When in Rome ... er, Paris ...

I asked the host for the telephone number, he gave us a card, and we went for a little walk. In less than five minutes we found a public telephone, made the call to find out when we could make a reservation and found out that we could come for dinner in 15 minutes, OF COURSE.

Back at the restaurant the man greeted us as though we were regulars. "Come, come," he said with a smile, seating us, then bringing a small glass of white wine to each of us. In other words, we had learned our manners. I guess at sit-down restaurants in Paris, they don't want some tourist to walk in as if the place were some lowly McDonald's.

And when the host presented us with an appetizer of braised leeks, I also learned that the mild member of the onion family was worth it's own dish.

I didn't have the presence of mind to ask for a recipe for the leeks (what with the free flow of wine and other things), but they weren't too hard to figure out.

Braised Leeks With Lemon Vinaigrette
Serves 4 as an appetizer

INGREDIENTS
4 leeks
1 cup chicken or vegetable stock (or 3/4 cup stock plus 1/4 cup dry white wine)
1 teaspoon mustard
2 Tablespoons lemon juice
4 Tablespoons olive oil
1 teaspoon chopped fresh thyme
salt and freshly ground black or white pepper

DIRECTIONS
1. Clean the leeks. Start with a rinse under running water to remove dirt from the roots (but don't cut off the roots) and strip off the outer layer. Then cut off the tops (dark green parts) that are too ratty to be used for anything at all.

Keeping the root end intact, slice the leek in half lengthwise, starting about half an inch from the roots going toward the top. Under running water, gently separate leaves just enough to rinse out the dirt and grit. When the leek is clean, trim the rest of the tops and save them for making stock. Sometimes the inner leaves higher up are lighter green and more tender. Those can be chopped and saved for cooking fish. (I keep my chopped leeks in little plastic bags in the freezer.)

Finally, trim the root end before putting the leeks into a medium pot (about 1 1/2 quarts to 2 quarts) together with 1 cup of chicken or vegetable stock.

2. Bring stock with leeks to boil, then reduce to simmer and cover. Simmer about 20-30 minutes, or until leeks are very tender, and remove from heat.

3. In a glass measuring cup or small bowl, whisk together mustard and lemon juice. Gradually add olive oil while continuing to whisk, then add thyme and a pinch of salt and pepper. Taste and add more salt if desired.

4. When ready to serve, place each leek on a small plate and spoon vinaigrette over the top.

This is a good appetizer or side dish with chicken, fish or egg dishes, such as quiche. It's also good as a snack with fresh baguette and a glass of white wine.

NOTE: Instead of making a lemon vinaigrette, you could reduce the stock, add a bit of butter and seasoning to finish the sauce and pour that over the leeks.

Wednesday, January 5, 2011

Baby Steps on Road to Improvement

Cornmeal-coated tilapia with couscous, lemony carrots and green beans

I may not make New Year's resolutions, but that doesn't mean I think my self improvement is done. It's just that I'm constantly reflecting on myself and how I can continue to grow, learn new skills, make smarter decisions, treat people and the planet with respect and be a better person in general. Shouldn't those aspirations guide me every day and not just once a year?

Symbolically I understand the urge to make the annual resolution. New year, new start. And for some people, the grand resolution may inspire great resolve. As for me, it's more effective to think of each day as a clean slate. If one day doesn't work out so well, then the next day I can start over, like Bill Murray in "Groundhog Day." There won't be a dramatic transformation as in "Extreme Makeover." It'll be more like a recipe you're working on. Each time you test it, you tweak it and make little improvements. Eventually you end up with something to feel good about.

Among my ongoing improvements is putting more thought into where my food comes from and the impact on the environment. I know many people are way ahead of me on this, but better late than never, no? Of course, here in the frigid Midwest winter, buying in season and local is a little different than it would be in California, where you'd be able to get produce from within the state, even from a farmers market, at any time of year. My choices are more like apples from two states away or cherries from a continent away. I choose the apples.

At the fish counter, I tend to have a little more trouble. I know I should steer clear of orange roughy and Chilean sea bass (both of which were on ice last week at the supermarket), but is trout okay? Does it matter whether it is wild or farmed, as it does with salmon?

Canada-farmed rainbow trout pan fried with teriyaki sauce
I've consulted Monterey Bay Aquarium's online Seafood Watch guides, but there was so much information that I couldn't remember enough by the time I got to the store. Fortunately, after my husband and I got me an iPod Touch for Christmas (um, yeah, I helped with that present), I was finally able to use the aquarium's mobile app.

It turns out U.S.-farmed tilapia and farmed rainbow trout are good choices, according to the guide. But lake trout could be okay or not, depending on which lake it came from. And Central American-farmed tilapia is supposed to be a good alternative to U.S.-farmed, but Asia-farmed tilapia is not.

I ended up buying farmed rainbow trout from Canada and tilapia farmed in Central America. I didn't really have a recipe for either. I just fried the trout, adding teriyaki sauce toward the end of cooking. The tilapia I seasoned with salt and pepper, dusted with cornmeal and pan fried in a little butter and olive oil. I finished with a squeeze of lemon (I've done lime too) and served it with herbed Israeli couscous, green beans and pan roasted carrots dressed with a lemon vinaigrette (recipe below).

I'm not deluded. I realize that my individual decision to pass up the Chilean sea bass and fry up the trout is not going to save the planet. But as my knowledge grows, hopefully, my improved choices will add up, and I can also help educate friends and family, whose choices will add up, and so on. If I'm successful, we'll maybe help the Earth in our small way, or at least not contribute to messing it up.

Lemony Balsamic-Thyme Vinaigrette for Roasted Carrots
I really think the brightness of this dressing complements the naturally sweet vegetable better than a sugary or syrupy glaze. This makes enough for at least two pounds of carrots.

INGREDIENTS
1 Tablespoons balsamic vinegar
1 Tablespoon lemon juice
1 teaspoon mustard
4 Tablespoons olive oil
1 tsp chopped fresh thyme
1 tsp grated fresh lemon zest
1/2 teaspoon salt (adjust according to preference)
1/4 teaspoon freshly ground pepper

DIRECTIONS
1. Whisk together balsamic vinegar, lemon juice and mustard, then gradually drizzle in the olive oil while constantly beating. Whisk in the thyme, lemon zest, salt and pepper.

2. Spoon about half the vinaigrette over two pounds of roasted carrots. Taste and add more dressing if desired. The dressing can be made ahead, but carrots taste best served right after being dressed.

This also is good for making a roasted carrot and potato salad.

Tuesday, November 2, 2010

Easy Peasy Split Pea Soup

Soups are a good way to use leftovers and prevent waste.

 Coincidentally, Tara Parker-Pope in The New York Times writes about wasting food just as I'm on a kick to use up leftovers instead of forgetting them.

Now that we have a preschool tuition to pay that we didn't last year, I've had to be much more conscious of our expenses, including groceries. It's easy to underestimate the cost of food, especially if you buy a little here and there throughout the week without keeping track. When you're paying attention, you realize how much the costs add up.

It isn't as though I suddenly realized wasting food was ... well, wasteful. I always peel and eat broccoli stalks, use celery leaves in a soup or stew, and cook beet greens and other veggie parts that some people throw away. I'm the only one in the house who'll eat toast made from the heel of a loaf, so I turn the ends into homemade breadcrumbs, which go into meatloaf that also incorporates leftover chopped spinach. Leftover sausage gets cut into small pieces and tossed with pasta, olive oil and broccoli rabe or beet greens. Even so, all too often I rediscover — too late — a forgotten container or a bunch of leeks in the vegetable drawer that have mushified. (Yes, I know it's not a real word, but it's a real problem.) It's easy to grab bunches of things that look amazing at the farmers market and then have no time that week to get to it all.

And that was usually my problem. I had no plan for many of my food purchases, and once they got stored at home — in the produce drawer, the pantry, etc. — it was "out of sight, out of mind." For the past couple weeks, I've been working harder on changing my habits, making sure to plan ahead what I'd prepare during the week and write my shopping list accordingly. If something I hadn't planned to buy was irresistible, I made sure to think what I'd make with it and when to do so. If something tempted me, but I couldn't think of what to make or when during the week I'd have time to get to it, then I resisted the urge to take it home.

Along those lines, I made a pea soup this past week, partly because the weather turned cold and partly because I had impulsively (old habits die hard) bought big bags of organic carrots and potatoes. Hey, they were on sale. I started out pretty well by prepping and roasting the potatoes and carrots the day I got them home. For me half the battle is not putting them in the bottom drawer of the refrigerator and losing track of them. That evening we had the veggies with roast chicken for dinner.

The next day we ate some of the leftover veggies. A couple days after that, I noticed the container of potatoes and carrots starting to migrate farther back into the fridge, getting ready to disappear behind a wall of yogurt containers.

Extra veggies can go into almost anything. I like to use them in pasta, omelets and quiches, and soups. A couple soups that take little effort and time are pumpkin-red lentil soup (to use up extra pureed pumpkin or other cooked squash) and split pea soup (to finish off potatoes, carrots and ham, if you eat meat).

Vegetarian Split Pea Soup
Serves 8

INGREDIENTS
1 Tablespoon olive oil
1 onion, chopped (about half to three-quarters of a cup)
2 small cloves or 1 large clove garlic, chopped (about a Tablespoon)
pinch of salt
1 bag dried split peas (1 pound, or about 2 cups)
2 quarts (8 cups) vegetable stock*
leftover cooked carrots (I had about a cup, but more or less doesn't matter)
leftover roasted potatoes (again, as much as you have or want)
salt

DIRECTIONS
1. In a medium (about 4 quart) pot over medium heat, stir together oil, onion, garlic and pinch of salt, and cook, stirring occasionally, until the onion turns translucent. Lower heat if it starts to brown or burn.

2. Inspect peas, discarding any stones or bad-looking peas. Put peas and broth into the pot of onion, bring to a simmer over high heat, then reduce heat and continue to simmer until peas break down and become soft, about 45 minutes.** Add carrots and potatoes, and heat about 5 minutes more. Taste and add salt and pepper if needed.***
 
NOTES:
* Normally I'd use water and simmer the soup with a ham hock or pieces of leftover ham, but when I don't have ham or just want a vegetarian version, I like to use vegetable stock or broth for the flavor. Use vegetable scraps to make broth and freeze ahead of time. I also keep on hand vegetable bouillon cubes. Chicken broth makes a good substitute if you aren't vegetarian or vegan.
** I think most recipes call for half or all the soup to be blended with an immersion (stick) blender or in a traditional blender. I like my soups to have some texture, so usually I don't blend.
*** Other seasonings you could use include a teaspoon of chopped fresh thyme leaves added with the carrots and potatoes, or a bay leaf added with the broth, or a teaspoon of curry powder added to the onions about a minute before the broth and peas are added. Experiment with what you like. My roasted carrots often are tossed with lemon zest and a lemon vinaigrette after coming out of the oven. If I were using plain carrots, I'd probably also add a little lemon to the soup.

Wednesday, October 6, 2010

Posole, and a Little Sous Chef


Posole, a hominy and pork soup, uses inexpensive shoulder, or Boston butt.
Posted at 4:09 PM
This past weekend my 3 year olds were sick — and crabby and irrational. And that's different, how? Oh, right. It's even more fun for their 7-year-old brother to rattle their cage. All. The. Time. Think "monkey house on Mountain Dew." The sun was shining, the air was crisp, and the universe had launched its plot to drive me mad. It was working.

As I started on a pork and hominy soup called posole, the kids tussled over a little car. Someone yelled in pain. I glanced over. No blood. Good. None of them normally cared about the car, but this particular afternoon two of them chased the car snatcher, yelling and knocking through the kitchen like Capital One barbarians. The moment I leaned into the fridge, someone rammed my backside, nearly planting my nose in the onions.

I snapped at the younger two as I chased them toward the basement. "You're going to play downstairs and be happy, right now!" To big brother, I ordered, "You. You stay with me!"

"I'm bored!" my son whined immediately.

"Here, peel this onion," I blurted. I just knew he'd bicker and I'd lecture him ... But he accepted the two halves of the Vidalia, sat at the kitchen table and started pulling off the outer layer.

He wasn't arguing. He always argued ... to play the Wii, play his DS, watch Sponge Bob, avoid homework, delay bedtime, ... But he wasn't. We weren't.

"Here," I said as the band of tension around my shoulders loosened. "Have another one."

At the kitchen table, we fell into a rythm. I cut an onion lengthwise, he peeled the halves and handed them back, I chopped.

"What's this for?" he asked?

"I'm making posole, you know, that corn soup you asked about last week."

"All right!"

Like me, he gets stoked over Mexican food: homemade tamales, flaky empanadas or our little invention, taco nachos - hors d'oeuvre sized "tacos" made of tortilla scoops, taco filling and cheese. Recently he had asked for "that corn soup" — the cumin-flavored soup of pork shoulder and hominy that we had eaten a lot last winter.

We started chatting about little things, school and food. "Do you want to help cook?" I asked as I turned the heat on under my Dutch oven. "You can bring a chair to the stove."

"Yeah," he said, unusually engaged.

"Ok, first pour in the oil," I instructed, handing him the olive oil and a small measuring cup. "Then you can dump in the onions. Stir them a little until they get soft and more clear. And make sure you don't lean too close or your T-shirt'll catch fire."

I stayed at his right hand, ready to save him from immolation, but he worked carefully. He measured and added the seasonings and I put in the pork and broth before tucking the pot into the oven for a couple hours.

He asked if I was putting the soup into my blog. Sure, I planned to write about this. Could he do it too? Could he! When I helped him start his blog, I'd been hoping he'd practice a little writing instead of playing with the Wii so much.

He spent the next half hour or so putting thoughts into words, checking spelling with me, asking if I could help load a picture into his blog.

I didn't need the soup to warm me inside.


The posole that we made Sunday includes apple, the tarter the better. It won't be too fruity. The apple dissolves into the soup. You could also try adding a strip of orange peel (remove the pith, which is the white fleshy part). If you have time you could use dried posole in place of the ready-to-use canned hominy. My son and his siblings happily emptied their bowls, no argument.

Posole Recipe
Pork Shoulder and Hominy Soup
Serves 4 to 6

INGREDIENTS
1/4 cup olive oil (or canola or corn oil)
2 onions, chopped
3 large cloves garlic, smashed with side of knife
1 apple, roughly cubed or diced
1 Tablespoon dried oregano
1 Tablespoon chili powder
3 pounds pork shoulder (mine was cut as "country style ribs")*
1 quart (4 cups) low salt chicken broth (or homemade pork broth if you have it)

1 to 2 Tablespoons cumin
2 (15 ounce) cans hominy, rinsed and drained
salt and pepper

roasted pepper (poblano, jalapeno or bell pepper)

optional garnishes: cilantro sprigs, lime wedges, crispy tortilla chips or fried tortilla strips, shredded lettuce or shredded cheese, sliced avocado, roasted tomatillo salsa

DIRECTIONS

1. Preheat oven to 350 degrees Fahrenheit.
Add oil to Dutch oven over medium flame. Cook onions, garlic and apple over medium to medium-low heat until onions soften and turn translucent.
Add oregano and chili powder and stir into the onions. Cook one minute.

2. Season pork with salt and pepper, then add to pot. Pour in the chicken broth and bring to a simmer. Cover and place into the oven until pork easily pulls apart, about 2 hours.

3. Remove soup from oven, and let sit covered 30 minutes. Remove pork and pull apart with two forks or your fingers. Discard fat.**
Return pork to pot, stir in 1 Tablespoon cumin and the hominy. Taste. Add more cumin and salt and pepper if needed. Simmer covered, over low heat, for 20 minutes more.

Top with strips or pieces of roasted pepper. Also add other garnishes as desired.

NOTES:
Use leftover meat to make pulled-pork sandwiches.
* You can get two meals by cooking once if you use a larger package of meat than you need for soup. When I cook extra pork shoulder, I like to use the meat for pulled-pork and cucumber sandwiches or for a meat sauce to go with pasta.
** You can remove more fat from the soup by skimming the oil from the top before returning the meat to the pot. If you make the soup a day ahead, you also can refrigerate the soup separately from the meat and then spoon off the fat that collects on the top. When ready to serve, put the pork back into the soup, add the cumin, hominy and any needed salt and pepper and simmer.

Below: My son wanted to demonstrate mixing in the hominy.

Friday, September 24, 2010

Farmers Market Fakes

These white radishes were grown locally.


Posted at 8:00 AM
One of my favorite vendors at a Saturday farmers market in Bloomington, IL, posts pictures of his crops and livestock on the farm's blog. Customers get monthly tours during the growing season. It's the real deal. They see for themselves where their long beans and shiso come from.

Purple and green long beans
When many of us head out to farmers markets tomorrow morning, how do we know all the vendors grew what they sell? Is the "pesticide-free" produce really free of unwanted chemicals?

A Southern California television station's investigation (video below) uncovered vendors at multiple farmers markets who falsely claimed to have grown what they were selling. The investigation found that three of five samples of "pesticide-free" strawberries contained pesticides, according to lab tests; one had four pesticides. I choose to be optimistic that the majority of vendors are honest. But if produce-savvy Californians could be fooled, so can anyone else.

The station, NBCLA, asked operators of farmers markets how consumers can protect themselves. They said shoppers should get to know the vendors, ask where the food was grown and, if vendors say the produce is pesticide free, ask what methods they use for pest control. The market operators said to avoid vendors who can't give specific answers or don't want to respond to questions.

That said, I know where my long beans came from. And I know where they went ... fast. (I got the last half pound of beans at the farmers market, but I'd have at least doubled the recipe had there been more.)

Long Bean Stir Fry
serves 2

INGREDIENTS
1 teaspoon canola or peanut oil
1 clove garlic, smashed*
1/2 pound long beans, cut into 2-inch to 4-inch segments (depending on preference)
1/4 cup water
1 Tablespoon soy sauce**
2 slices cooked bacon, crumbled (optional)

DIRECTIONS
 1. Heat oil with garlic in non-stick skillet*** over medium high heat for just half a minute. Add long beans, stirring to coat with oil, then add water, cover and let steam.

2. When water has evaporated, check bean for doneness. If they need more cooking, add a couple tablespoons more water and cover again until you hear the sizzling that lets you know it has evaporated again.

3. When beans are done, add soy sauce and bacon, toss until beans are coated with sauce, then remove from heat.

NOTES: * Sometimes I use chopped shallot in place of or in addition to garlic.
** You can try a teaspoon or two oyster sauce in place of soy sauce.
***If you use a regular skillet or a wok, you may need to use a little more oil.

View more news videos at: http://www.nbclosangeles.com/video.

Monday, September 20, 2010

One Potato, Two Potato ...

Potato latkes, the edges still shatteringly crisp.
 I was making a gratin Dauphinois and realized I had cleaned and peeled too many potatoes. I couldn't just slice and pile them into the baking dish; that would make the gratin too deep.

What to do if you have too many potatoes? Or should I say, what not to do with extra spuds? Celery root and potato mash? Fries? Wedges? Gnocchi? Potato leek soup? Lemon bacon potato salad?

This time I wanted latkes. I love the light crisp edges that shatter as you bite into them. This version of latkes does not use flour, so it's great for anyone with wheat allergies or gluten intolerance. If you don't want to eat them right away, you can cool them and freeze them until you need them. They're great as an appetizer with sour cream and applesauce (or even better, creme fraiche and smoked salmon or caviar), as a side dish with eggs for brunch or dinner, or as a midnight snack.

Potato Latkes
makes 6 potato pancakes

INGREDIENTS
3 medium-large yukon gold potatos or 2 smaller russets*
1 shallot
2 (3-inch) sprigs thyme
1/4 teaspoon salt
1/4 teaspoon pepper
1 egg, beaten
canola oil (enough to pour 1/8 inch to 1/4 inch deep in a skillet)

DIRECTIONS
1. Peel and grate potatoes into a bowl or quart-size measuring cup of cold water (to prevent discoloration).

A little shredded carrot added to the mix.
2. While potato sits in water, finely chop shallot and place in a larger (2- or 3-quart) bowl.

3. Remove leaves from thyme stems and put into bowl with shallots.

4. Drain potato and place in a clean, dry kitchen towel. Roll and squeeze as much moisture** out of potato as possible. Place potato into the large bowl with the shallot, thyme, salt and pepper, then mix with just enough of the egg to coat the potato shreds.

5. Heat about 1/8 inch to 1/4 inch of oil in a skillet until it gets hot (not smoking) and place a forkful of the potato mixture into the oil and gently flatten to make a roughly 3-inch pancake. You can cook just one smaller latke to test the oil before making the rest, if you want. Cook until the edges are deep golden brown, then turn over the latke and cook the other side. If the edges turn dark or black too fast, lower the heat a bit.

6. Remove latke to a rack and sprinkle lightly with salt.
Serve immediately, or cool the latkes, then freeze them, separated by parchment paper, in an airtight container. They can be reheated in a 400 degree oven on a cooling rack set on a baking sheet.

NOTES: * Variations include mixing grated carrot or sweet potato together with the potato. You could also incorporate another vegetable such as shredded zucchini; just make sure to lightly salt and drain it and squeeze out as much moisture as possible. In place of the shallot, you can add leek chiffonade, grated onion or chopped scallion.
** If you have a salad spinner (I don't), then you can try using that to take out excess moisture. If more liquid collects at the bottom of the bowl while you're cooking, scrape the remaining potato mixture out of the puddle and up onto the sides of the bowl.

Saturday, August 28, 2010

Watermelon Strawberry Smoothie


When I was studying in Aix-en-Provence, France, there was a little hole in the wall called Crepes a Go Go where I'd regularly stop to pick up my lunch, usually an egg and spinach filled crepe with a smoothie on the side. What I liked best about it was that I could choose the fruit and they would take my chosen fruits, a whole kiwi or pear or peach, and peel and cut it right in front of me before tossing the pieces together with some strawberries and ice into a blender. It didn't get fresher or tastier than that.

For some reason, it took me several years to make my own smoothies. I don't know why. They were easy to throw together and I'd seen it done a hundred times. But I guess it just wasn't part of my repertoire until I got together with my now-husband. He was a runner who made his own smoothies, and suddenly something clicked. I decided I'd make my own blended drinks too.

The usual was simply banana with a little yogurt, soy milk and honey (plus sometimes a spoonful of protein powder). But whenever there was some extra fruit lying around, into the blender it would go, along with a few ice cubes and juice too.

Now I deliberately buy more fruit than we can eat right away so I can blend the extra into a drink.


Watermelon Strawberry Banana Smoothie
Serves 2 adults or up to 4 children

INGREDIENTS
1 cup frozen strawberries
1 cup frozen watermelon (watermelon cut into 1 inch pieces, then frozen)
 1 small banana
1 cup juice (any kind you like)
1 cup vanilla soy milk

DIRECTIONS
Place all ingredients into a blender and process until smooth. If mixture is too thick to blend, add a 1/4 cup to 1/2 cup more juice or soy milk.

Pour into glasses or cups and serve immediately

Friday, August 20, 2010

Egg-Free, Make that Dairy-Free and Fat-Free Too, Vegan Banana Ice Cream


Just as the chicken shit was hitting the fan and hundreds of millions of eggs were being recalled, I was playing around with an egg-free, fat-free, dairy-free "ice cream" recipe I had seen bouncing around the Internet for a while.

To be precise, I probably shouldn't call it a "recipe" because it's just one ingredient. But really, this frozen banana whip does taste like ice cream -- even my picky 7 year old thinks so.
The best part is that I haven't met a kid who doesn't like it and it's great for everyone -- meat eaters to vegans -- unless you're a banana hater. (Do they exist? Like unicorns, I've heard about them but come on ...)

No sugar is added, which is great for diabetics. Like most ice cream, it's wheat free, soy free and gluten free, so fine for celiacs. There is no cream or milk, thus no dairy for anybody who has a milk allergy or intolerance, and did I mention no fat? And there are no eggs, which is perfect right now, unless you WANT that side of salmonella with your dessert. All right, I concede that tomorrow, I'll probably use eggs in my next dessert. But I'll be checking the latest details on that growing egg recall first and making sure the dish is cooked fully.

Eggless Banana Ice Cream Recipe
Serves 4

INGREDIENTS
4 to 5 ripe bananas, depending on size

DIRECTIONS
1. Peel bananas, making sure to remove all strings. Cut into pieces (mine were from half inch to an inch), put them in a gallon-size freezer bag (or lay them on a layer of parchment on a cookie sheet or place in a non-stick 9 x 13 cake pan) and freeze the banana chunks at least an hour.

2. Put banana chunks into a food processor and whiz. At first the pieces will be rough chopped. Then they will be more finely chopped, and often resemble couscous. Keep processing (stop and scrape banana down from sides of processor as needed) and eventually the banana will become smooth and whipped, much like a soft serve ice cream or a churned ice cream that hasn't fully set.

That's it. Serve in a cone or in a bowl. You can top it with chocolate syrup, chopped peanuts or with hot fudge and whipped cream.

NOTE: The first time I made this, there was a distinct bitter aftertaste. When I made this again, it was fine. The second time I used organic bananas that were fully ripe (no green tinge, lots of brown freckling, but not black and mushy), and I was particularly careful not to allow the little strings to go in with the banana chunks.

Some people add a couple tablespoons of peanut butter to their banana ice cream. Some also like to make it chocolaty with a little cocoa powder. I personally think that Nutella would be fab.

Related: The Cornucopia Institute's Organic Egg Scorecard

Sunday, August 15, 2010

Chinese Pulled Pork Sliders, or Non-traditional Gua Bao

Pork shoulder makes a great substitute for belly in this sandwich.


Until I learned about the Momofuku eateries in Manhattan and eponymous cookbook this year, I hadn't realized that Chinese pork sandwiches, a popular menu item, were so appreciated here in the states.
Momofuku's creator, Korean American chef David Chang, apparently knows a good thing when he tastes it and has shared his discovery.

Of course in my case, he would be preaching to the converted. Yesterday I was craving some Taiwanese gua bao, made of pork belly, pickled greens, a little crushed sugared peanuts and steamed buns, but around here there aren't any restaurants making that kind of food, traditionally served streetside from a cart. I have no better luck even finding a simple slab of pork belly. My supermarket never, I mean NEVER, carries slabs — just tiny packages of thin-sliced belly. But yesterday while I was picking up a few groceries, the packages of pork shoulder, my go-to economy cut, caught my eye. Hmmmm ... I love Taiwanese pork belly buns. I love Southern pulled pork.

At that moment I decided that Southerners don't have to be the only ones to claim pulled pork as their birthright. I would do a Chinese pulled pork shoulder as the filling for my homemade gua bao. For the braising liquid, I would go with something similar to the one for my soy sauce chicken.

I didn't have the pickled greens on hand, either. Tradition already out the window, I decided the shiso greens would have to stand in for the picked greens, or suan cai. It was a good choice. The shiso gave the sandwich a note of herbal freshness contrasting with the rich salty sweetness of the braising sauce. I had some honey roasted peanuts that I planned to crush and sprinkle on the meat, but ... ahem ... I mumble ate mumble them ... something happened to them while the pork was braising.

For the bun, I didn't have time or a steamer available to make my own from scratch, so I pulled a package of man tou from the freezer. My gua bao ended up being something like a Chinese pulled pork slider. I managed to take a picture just before I finished off the last one.

Chinese Pulled Pork Sandwich Recipe

INGREDIENTS

1 1/2 cups low sodium soy sauce
1/2 cup red wine
3/4 cup water
1/4 cup packed brown sugar
1 shallot, chopped
3 scallions, cut into 1 1/2-inch pieces
2 cloves garlic, smashed
1-inch piece ginger root, cut into thin slices
1 teaspoon Chinese five spice

2 pound pork shoulder (aka butt roast)

DIRECTIONS
1. Combine all ingredients except pork in a medium saucepan. Stir sauce over medium-high heat until sugar dissolves, then add the pork, turning to coat with sauce, and bring to simmer. Reduce heat to low, then cover and let simmer until pork is fall-from-the-bone tender, about 3 hours.

2. Allow to cool, covered, until pork can be handled.

3. Reserve one cup of braising liquid and bring it to a boil in pan until reduced to a thick, almost syrupy consistency. Meanwhile, pull pork meat apart and discard pieces of fat. Toss pulled pork with reduced sauce, and when ready, serve pork in a steamed bun (available in the freezer section of many Asian grocery stores), garnished with pickled greens or fresh greens, if you prefer.
If buns are unavailable, serve rice or noodles.

Thursday, July 15, 2010

Ma Po Tofu


Last night, I was about to scrape the last bite out of my daughter's bowl and into my mouth when she shouted, "NO, NO, NO!"

Whoa. You'd have thought I was swiping the kid's precious ice cream, or her lovey, Yang Yang ("Lambie"). I was simply trying to help her clean up the dregs of her ma po tofu. I couldn't blame her. The recipe is really tasty, and she wanted that last spicy bite herself. But she's only 3 years old, which makes me secretly proud of the little chip off of mommy's block. Her brothers don't love the dish as much as she, but they will eat it without me tying them down and sticking a funnel in their mouths, which is quite an accomplishment when you have picky kids.

I can't remember a time when tofu wasn't on the menu when I was growing up. Tofu stir fried with ground meat in a soy, oyster sauce, garlic, ginger concoction. Or tofu cooked with hard-boiled eggs in the braising liquid from silky soy sauce chicken (or red cooked chicken, similar to Chairman Mao's supposedly favorite pork dish, hong shao rou). When my parents took us to a Chinese restaurant, occasionally we'd get ma po tofu, a spicy, irresistibly savory dish.

Oddly (to me), when I was telling a neighbor friend some years back about how much I liked bean curd, she made a face, wrinkled her nose and looked as though she were going to gag. About 20 years older than I, she'd grown up in a Sicilian-American family and made it her mission to introduce me to lamb, real "gravy" (I was surprised to learn it was a tomato sauce and not some brown, roux-thickened meat juice) and other Italian-American delights. In response, I used to tease her that if all Italians had been intimidated by Chinese food, they wouldn't have learned to make noodles. (No, I don't really think that's true.) If only I'd learned to make ma po tofu back then. She may have discovered how enjoyable and satisfying (for me, addicting) spicy bean curd can be.

The following recipe owes a huge debt to Jen Yu of UseRealButter.com. I checked out numerous recipes online, but her version is the one that used ingredients that were close to what I could easily get my hands on in central Illinois (unfortunately I haven't found sichuan, aka szechuan, pepper corns). She also includes bamboo shoots (bless her!), which are among my favorite foods, especially when thinly sliced and packed in chili oil. (In the batch pictured above, I used a small can of bamboo strips packed in water that I sliced crosswise. Just add more chili bean sauce or some hot chili oil if you want more heat.) I made some minor adjustments to her recipe based on what was in my kitchen and made sure it wasn't too spicy for my kids to eat. Another good recipe for those who want an authentic flavor is Fuchsia Dunlop's ma po tofu in her book "Land of Plenty." For a peek, take a look at Serious Eats.

Ma Po Tofu
Serves 4

1 Tablespoon peanut or canola oil
1/2 pound ground pork (or beef or turkey)
1 teaspoon grated fresh ginger
1/2 cup chopped scallion (white parts only, greens reserved for garnish)
1/2 cup chopped bamboo shoots (I used a small can of bamboo strips)
2 cups chicken or beef broth/stock
1 Tablespoon chili bean sauce (dou ban jiang)
1 Tablespoon black bean garlic sauce
1 rounded teaspoon fermented black beans (optional)
1 Tablespoon sesame oil
1 Tablespoon soy sauce (optional -- omit if broth is salty)
2 blocks tofu (about 24 to 28 ounces), cut into 3/4-inch to 1-inch cubes
2 teaspoons cornstarch mixed into 1/4 cup water (slurry)

DIRECTIONS
1. Place 1 Tablespoon peanut oil in a wok or a deep 12-inch skillet over medium-high heat and stir-fry ground meat just until it is no longer pink.
2. Add chopped scallion whites and grated ginger, and saute with meat about 30 seconds.
3. Lower heat to medium, add remaining ingredients except the cornstarch mixture, and stir until combined. Allow to simmer 10 minutes and add slurry. When sauce thickens, cover ma po tofu and remove from heat.

Serving suggestions: Ladle over white rice, and serve with cooked napa cabbage.

Variation: Stir in 1/2 to 1 cup frozen petite peas at the end.
If you want a meat-free dish, you could use textured soy protein in place of the ground pork (or beef or turkey).

Wednesday, July 14, 2010

Dip-Snackin' Good Hummus Recipe

I still love dips, even if the Centers for Disease Control and Prevention warned us of the danger potentially lurking in salsa and guacamole, especially in restaurants.

I'll take a homemade salsa of roasted tomatillos, onions and other goodies any day. And don't even ask me about guacamole. I could support the California avocado industry single-handed.

But my new favorite is hummus. It works as a snack (a dip) and as a vegetarian entree (a filling for sandwiches or served with a salad). All three of my picky kids will eat it. I repeat: ALL THREE. KIDS.

I can't say the same for most other foods. My daughter loves avocados as I do. Her two brothers act as though it were slug slime. My hubby loves the tomatillo salsa. Kids, blech. I can't even get all three kids to be happy with grilled cheese sandwiches or macaroni and cheese all at the same time. I usually say, "You get what you get, and you don't get upset."

Occasionally I just want everyone to eat and be happy without my becoming a short order cook or setting up a big buffet or letting someone go hungry. That's when I throw together something they all like, such as Korean-style beef strips or Thai cucumber salad and hummus.

Chickpea Hummus

INGREDIENTS
2 (14 ounce) cans chickpeas (about 3 cups total)
3 tsp chopped garlic (or 5 cloves of roasted garlic)
2 tsp sesame oil*
juice of 1 lemon
1/2 tsp salt (taste and add more, if needed)
1/2 tsp freshly ground black pepper
1/2 cup extra virgin olive oil**

DIRECTIONS
Put chickpeas, garlic, sesame oil, lemon juice, salt and pepper in the bowl of a food processor and start to puree. With machine running, drizzle in olive oil until mixture is smooth. Stop machine and scrape down sides if needed.

Serve hummus with pita wedges, shredded-wheat crackers or chips, or spread hummus on soft, thin flatbread and roll to eat.

NOTES:
*Traditional hummus recipes use sesame tahini (paste), but I don't typically keep on hand a container of tahini, and I never want to run out to get it just for a small batch of hummus. I find that the sesame oil is a substitute that I really like.
**You could use water or chicken stock/broth instead of oil, if you want to lower the fat content the way my husband does, but I always use olive oil.
***Other things I frequently like to add to the recipe include a Tablespoon of chopped flat leaf parsley and a half teaspoon to a teaspoon of cumin. Another tasty addition would be some pureed roasted red bell pepper.

Sunday, July 4, 2010

Grilled Beef Strips

I'm always looking for ways to make a little go a long way, especially when it comes to red meat. For one thing, satisfying a family of five with steak can get expensive. For another, too much red meat isn't healthful.

One way we get a lot of enjoyment out of a modest amount of meat is to either stir fry or grill strips with a highly flavorful marinade. Today being the 4th of July, we're in the mood to fire up the Weber.

I like doing a marinade inspired by the slightly sweet and salty Korean bulgogi (grilled strips of meat, often thinly sliced ribeye) using the best steak deal I can find. We've used sirloin, but to be economical, I keep an eye out for what my supermarket calls "tip sizzler steak" (shown in photos). It's a boneless steak that I can often pick up for less than $4 a pound. I've also used something the supermarket calls "tip steak cap off."
We serve it with some Thai-style cucumber salad, a napa slaw-salad with a very mild dressing barely hinting of kimchi, some Japanese-style radish and carrot quick sweet pickles and white rice.

Korean Style Beef Strips Recipe
Serves 4 to 6

INGREDIENTS

1 pound sirloin or tip steak (an economy cut)

3 Tablespoons low sodium soy sauce
2 Tablespoons brown sugar
1 Tablespoon rice wine
2 teaspoons sesame oil
2 teaspoons sesame seeds, toasted preferred
1 teaspoon grated fresh ginger
1 large clove garlic (or 2 small cloves), chopped
1/4 medium onion or 1 shallot, chopped or grated
1/4 pear, grated
1 teaspoon sriracha or gochujang chili sauce

PREPARATION

1. Place beef in freezer for half an hour to an hour to get firm before slicing into thin strips, across the grain as much as possible. (In my freezer, the steak needed about an hour to firm up.)

2. Combine rest of ingredients and pour over beef in baking dish or in a gallon size zip-close plastic bag. Make sure all slices are well coated. Let marinate 1 hour.

3. Beef strips can be seared/grilled in a pan atop the stove over medium-high heat or skewered and cooked on an outdoor grill to desired doneness. When I seared them indoors in a pan, they took less than 1 minute per side and were slightly pink in the middle. When my husband cooked them on our Weber grill, they took about 2 to 3 minutes per side and had just a barest hint of pink inside. They remain tender if not overdone.

Wednesday, June 30, 2010

You Have One Hour, and Your Time Starts ... Now


Quick! You're invited to a barbecue at the last minute and you need to throw together a contribution. What to make? That's why it's always good to have a couple of quick crowd pleasers in your repertoire. Like an easy blueberry sour cream cake.

This one evolved from a raspberry buttermilk cake published last June in Gourmet (sigh, I do miss it).  I always have almonds in the cupboard, so here, instead of 1 cup of flour, I use 3/4 cup flour plus 1/4 cup ground almonds, and in place of the buttermilk I use sour cream (or plain Greek-style yogurt), because I never seem to have buttermilk just sitting around in the fridge. My hubby and I don't like our desserts extremely sweet, so I decreased the sugar to 1/2 cup (instead of the original 2/3 cup).

Also, the leavening in the original recipe seemed excessive for what amounts to 1 cup of flour, so I've cut the baking soda in half (down to 1/8 teaspoon). Cooking science experts, such as "Bakewise" author Shirley Corriher, say that too much leavening actually drives air out of the batter instead of giving a cake more lift. The adjustment seemed to work. My husband didn't know about my change to the recipe and commented that the cake turned out lighter.

Blueberry Sour Cream Cake

INGREDIENTS

3/4 cup flour plus 1/4 cup ground almonds* (OR just 1 cup all purpose flour)
1/2 teaspoon baking powder
1/8 teaspoon baking soda
1/2 teaspoon salt
1/2 stick (2 ounces) butter, softened
1/2 cup sugar
1 large egg
1 teaspoon vanilla
1/8 teaspoon almond extract (optional)
1/2 cup sour cream or Greek-style yogurt
1 heaping cup blueberries**
1 tablespoon sugar (any kind of sugar crystals, eg. regular white sugar or turbinado sugar)

DIRECTIONS

Before making the batter, place oven rack in the bottom third of oven*** and preheat to 400 F at least 15 minutes.
Generously butter and flour a 9-inch round cake pan (or spray nonstick cake pan with cooking spray) so that it will be ready when you need it.

1. In a medium bowl, mix together flour, ground almonds (if using), baking powder, baking soda and salt with a fork. This helps ensure you don't get a clump of baking powder or soda in one spot.

2. In a large mixing bowl, cream together butter and sugar, about 2 minutes, until fluffy. I use a medium speed of my hand-held electric mixer.

3. Add egg and extracts to butter, mixing well to combine.

4. Add about 1/3 dry ingredients into batter, mixing them in at low speed, then half of the sour cream. Mix in another third of the dry, followed by remaining sour cream. Mix in the rest of the dry ingredients just until combined.

5. Spread batter into prepared cake pan, and then arrange berries on top.
Sprinkle with 1 tablespoon sugar and bake at 400 F until golden brown and tester inserted in center comes out with no raw batter, about 25 minutes. (You may have to adjust the time depending on your oven.)

Let the cake cool in the pan for about 15 minutes. Run a knife between the cake and the side of the pan to
loosen the cake, place a plate on the pan and then invert it onto the plate. (This is the reason you need to generously butter and flour the pan ahead of time.) Remove the pan carefully, leaving the cake on the plate. Then invert the cake onto another plate so that it is right side up again.
Serve with fresh berries and whipped cream

NOTES:
*I really like using ground almonds (I whiz blanched slivered almonds in a food processor with a level tablespoon of sugar until they are ground relatively fine). But the original recipe used just 1 cup of all purpose flour (I like King Arthur Unbleached All Purpose), and it tasted very good that way too. If you don't use the ground almonds, you can add the tablespoon of sugar that would have been with the almonds to the creamed butter instead.

**The original recipe also called for 1 cup of raspberries, but I prefer 1 1/2 cups berries. I've also made the original recipe and this version with strawberries and pitted cherries, and all the variations were delicious.

***I like to preheat my oven (it's NOT convection) ideally for 20 to 30 minutes. I also keep a baking stone on the oven rack to preheat along with the oven and place the cake pan on the baking stone. This seems to help prevent the temperature from dropping drastically when I open the oven door to put the cake in. It also seems to keep the heat that hits the bottom of the baking pan more even.

I know this recipe by memory now, so it comes together super quickly for me (just under an hour from measuring ingredients to a slice on my plate). But I still set up the ingredients before getting started, and I place them in bowls on my counter (just like on TV cooking shows) in the order that I will be using them (a.k.a. mise en place). Not only does it let me zip through preparation quickly and easily, it makes me less likely to forget an ingredient. Yes, I've had a more than a few senior moments.

Friday, June 25, 2010

Cue the Cukes

I can't believe it's been a couple of months. We got sick after the week of birthdays and other doctors' and school district appointments that couldn't wait -- I was burned out. Then came the Disney vacation, then the recovery from vacation and getting kids who are home from school to occupy themselves with something other than a glowing, mind-melting TV screen.

But I promise I'll do better and offer the recipes soon for the cakes (they are sort of Frankenrecipes, so I have to pull them together to present them in a readable way).

Meanwhile, we've spent the past couple of weeks eating more healthful foods -- grilled chicken breast (satay style), small low-fat sirloin burgers and brats. Well, the brats aren't that healthful. But our overall diet is.

But my favorite dishes lately have been not the meats, but the sides -- peanut noodles, cellophane noodles, little quick carrot pickles and cucumber salad.

The cucumber salad is truly amazing. The cool freshness of the cukes accented by the zesty Southeast Asian-inspired dressing doesn't just taste great to me. My three children, all LOVE it, including one very picky nearly 3 year old who used to be fed via tube. I had made a batch after breakfast one day, and he came trotting into the kitchen for a bite, then back to his toys in the family room, then back for a bite ... His twin sister wouldn't leave my side and kept taking one after another. Within half an hour, the bowl was empty and I had to rethink our veggies for that night's dinner.

Tangy Cucumber Salad 2.0

INGREDIENTS
1 large seedless cucumber or 4 mini seedless cucumbers (about 14 to 16 ounces)

finely grated zest of half lime
juice from half lime (I get about 1/8 cup lime juice)
1 rounded tablespoon brown sugar
2 tablespoons fish sauce
2 tablespoons peanut oil (or canola oil)
1 tablespoon low sodium soy sauce
1 teaspoon grated fresh ginger (optional)
1/2 to 1 teaspoon sriracha (hot chili) sauce

garnish (to sprinkle over salad when serving): 1 to 2 tablespoons toasted chopped peanuts or black sesame seeds or chiffonaded thai basil

DIRECTIONS
1. Slice small cucumbers into coins or ovals (about 1/4 inch thick) or cut large cucumber in half lengthwise, then across into 1/4 inch thick half-moon pieces. Place slices in a colander over a bowl to drain 1/2 hour to 2 hours.

2. Combine remaining ingredients for dressing. Just before serving, toss cucumber with some of the dressing to coat slices. Don't dump all of the dressing at once. It can be a little strong for some people, and you can always add more if you want.

3. Sprinkle with preferred garnish, and eat immediately.

NOTE:
This salad does not keep well after the dressing is combined with the cucumbers. If preparing ahead of time, keep dressing and sliced cucumber in separate containers.

This recipe's success REQUIRES the fish sauce and some sort of chili sauce. I like Three Crabs brand fish sauce and Huy Fong sriracha, which I get at my local Asian grocer, but some supermarkets in my area do sell some sort of fish sauce and chili sauce in the Asian section of the international foods aisle. Those are the ingredients that MAKE the dressing. And put down the bottled lime juice -- step away from the little green plastic bottle.

This dish was inspired by another cucumber salad I used to make, which itself is an adaptation of a Sweet, Tart, and Spicy Shrimp and Cucumber Salad from Epicurious. It's a tad simpler, and uses less fish sauce for those who are intimidated by its rich flavor. But I recommend going for the version with more flavor, unless you REALLY are sensitive to the taste of fish sauce. Three Crabs brand is already pretty mild.

Cucumber Salad 1.0

INGREDIENTS
1 large seedless cucumber or 4 mini seedless cucumbers (about 14 to 16 ounces)

finely grated zest of half lime
juice from half lime
2 tablespoons brown sugar
1 tablespoon fish sauce
1 tablespoon peanut oil (or canola oil)
1/2 to 1 teaspoon sriracha sauce

 DIRECTIONS -- Same as for the other cucumber salad, minus the extra ingredients.

Friday, March 26, 2010

Pumpkin Red Lentil Soup

So much for spring. I wake up to the temperature below freezing and the windchill well below that.
I guess it's a hot soup day again.

One of my favorites is this pumpkin red lentil soup. My husband, when he was still my fiance, introduced me to a vegetarian version of this recipe that I've adjusted for my taste and whatever is on hand. That's what I love about this soup. It's so convenient and tweakable.

Make it with vegetable stock, chicken broth, coconut milk or a combination. Add grated carrot and ginger. Use roasted pumpkin, canned pumpkin, baked or poached butternut squash or frozen winter squash. Keep the seasoning simple with salt and pepper, add lemon zest, or spice it up with cumin or curry or hot pepper.  Top it with roasted pumpkin or acorn squash seeds, or freshly grated parmesan, or pan toasted bread crumbs or croutons. Serve it with a sandwich, or salad and bread, or build it up by adding some tubettini or orzo pasta to the pot. No matter what you do, it works and my three picky kids will eat it.

The fact that it's healthful is just gravy. There's lots of nutrition and fiber in the pumpkin puree and the lentils.


Roasted Pumpkin and Red Lentil Soup With Tubettini
Serves 8

INGREDIENTS
1/2 cup chopped celery
1/2 cup chopped onion or shallots
1 Tablespoon olive oil
1 clove garlic, smashed with flat of chefs knife
1/4 cup dry white wine (optional)
1 quart chicken or vegetable stock
8 oz. red lentils (1/2 pound), sorted and rinsed
1 14-oz. can pumpkin puree (or equivalent quantity roasted pumpkin or other squash)
1/2 cup tubettini pasta (optional)
Salt and pepper, to taste
Parmesan cheese (optional)

PREPARATION
1. Chop celery and onion and add to pot together with smashed garlic. Cook on medium-low until translucent, adjusting heat if necessary to avoid browning.

2. Stir in wine and stock and add lentils. Simmer until lentils are soft and break apart, about 30 minutes.

3. Add tubettini pasta and cook according to directions. Just before pasta is cooked, add pumpkin puree and stir to incorporate. Season to taste.

When serving, garnish with freshly shaved parmesan. Allow diners to grind their own pepper on top.

Notes:
* The "red" lentils I've used always start out an intense orange color, and become a golden yellow during cooking. They also break down much more than the French lentils I also use. That's all normal.

* I have used roasted pumpkin, and roasted butternut and acorn squashes in this recipe. But canned pumpkin is easy to keep on hand and allows you to throw this soup together very quickly. You can also use the precooked pureed winter squash available in the freezer section of the supermarket.

* I go light on the seasoning for my kids, but you can add a teaspoon or more of cumin or a sprig of thyme or cilantro (good with the coconut milk version of the soup), or warm it up with some cayenne or Chinese white pepper (the same kind that puts the heat in hot and sour soup). You can also add a splash of fresh-squeezed lemon juice to brighten it up.

* This recipe is easy to convert to vegan or gluten free. For a vegan version, use vegetable stock and skip Parmesan. For gluten-free soup, use gluten free pasta in place of tubettini.

Thursday, March 11, 2010

Sweet (and sour) memory


Born half Chinese and half German-American, and reared in a New York City suburb densely populated by Italian-Americans,  my younger sister and I were obligated to like pork. On our round woodish-laminate dinner table, we often found pork schnitzel (breaded cutlets), bacon, baked ham, Italian pork sausage, Black Forest ham sandwiches, Chinese pork sausage (la chang), ro sung (fried finely-shredded seasoned pork), prosciutto, Chinese ribs, bratwurst …

So on Saturdays when my parents took me and mei to a little Chinese restaurant crammed into a shopping strip in Emerson, NJ, it was only natural that I’d ask for sweet and sour pork. Sometimes I'd want egg foo young or a pu pu platter. Occasionally they'd indulge me, but my made-in-Taiwan mother didn’t herself care for those American favorites. (She also cruelly denied me fluffernutter sandwiches, Cap'N Crunch cereal and a host -- or should I say Hostess -- of other childhood necessities.)

Most times I'd be left scorning the hot tea poured into my water glass and the crunchy duck or ma po tofu on my plate. At the end of the meal, after my dad separated the check from the fortune cookies and orange wedges, I'd peel myself from the reddish-brown genuine Naugahyde-covered banquette and vow that when I grew up I would eat whatever I wanted. (Then when I grew up, what would I order but crunchy duck and ma po tofu...)

Still, in recent years, I’ve been craving and learning to cook some of my old Chinese-American restaurant favorites. But preparing regular sweet and sour pork takes more time than I usually have.

In this dish, using whole cutlets saves me from having to cut a gajillion bite size pieces, then dip ALL of them to get the special coating on every piece, then deep fry the multitude. And pan frying the chops in a skillet cuts down on the cooking oil (and helps reduce the amount of grease that pops and splatters all over the stove and floor).

The list of ingredients looks long, but throw together the sauce ahead of time. Then later, prep the other ingredients, or if you're really short on time, buy bagged pre-cut fresh or frozen vegetables.

Sweet and Sour Sauce

INGREDIENTS

2 1/2 Tablespoons ketchup
2 teaspoons plum sauce
2 teaspoons oyster sauce
2 teaspoons brown sugar
1 teaspoon soy sauce
1 teaspoon worcestershire sauce
1 teaspoon sesame oil
1/4 teaspoon rice vinegar
1 teaspoon hot sauce or red pepper flakes (optional)

PREPARATION
1. Combine all ingredients in a cup. Set aside.


Easy Sweet and Sour Pork*
Serves 4

4 pork cutlets or thin loin chops, lightly seasoned with salt and pepper (or marinated with 2 teaspoons soy sauce and 1 teaspoon rice wine or cooking sherry)

1/4 cup flour mixed with
1/4 cup cornstarch

canola oil or peanut oil (enough to fry chops)


1 red bell pepper, cut into 1 inch pieces**
1 green or orange bell pepper, cut into 1 inch pieces
1 medium onion, chopped
2 cloves garlic, smashed
1-inch piece ginger, grated
1 8-ounce can pineapple tidbits
5 scallions, cut into 1 inch pieces (reserving some of the green portion to garnish if desired)

1 recipe sweet and sour sauce
1 Tbsp cornstarch dissolved in
1/4 cup cold water

PREPARATION

1. Dredge chops in flour-cornstarch mixture.

2. Pour enough oil to cover bottom of a hot skillet.

3. Fry both sides of cutlets in skillet until golden brown, and transfer to a plate in a 275 degree F oven.

4. Remove all but 1 tablespoon of oil from pan. Cook peppers and onions over medium flame to desired degree of tenderness and add scallions, smashed garlic and ginger. Cook another minute. Mix in pineapple chunks and sauce. Remove from heat.

5. When ready to serve, return pan to heat, add cornstarch dissolved in water and let thicken. Serve with chops and rice.

Notes:
* If you don't eat pork, use chicken.

** Once cooking starts, there is little time for mixing or slicing, so prepare sauce and vegetables ahead of time. I make the sauce and slice the vegetables early in the day or even a day before cooking this for dinner.

*** You could coat cutlets or chops in breadcrumbs or panko bits or a tempura batter if you prefer.
Related Posts with Thumbnails