It's no shocker that a study this week in the Journal of the American Medical Association found that the calorie contents listed by popular restaurants was sometimes blown away by the actual calorie contents of the food.
To be fair, the majority of calorie listings were pretty much on the mark. But if you need to watch your calories, that isn't good enough, especially considering that some of the discrepancies were huge - as much as 1,000 calories more than what the restaurant had posted.
This underscores why we all should know the basics about nutrition and use a little common sense. If a salad is delicious because it's drowned in dressing and buried in other toppings, doesn't it stand to reason that simply containing a wedge of iceburg doesn't make it diet food? Imagine it without the lettuce. And if you put half a pound of cheese on some nachos, could the dish possibly be just a 100 calories?
You can find nutrition information from the Mayo Clinic and the federal government. You also can pick up a lot of knowledge by reading labels at the supermarket. A tablespoon of butter has about 100 calories whether you eat it at home or in a restaurant. So if you eat out and your order of steak or broccoli comes dripping with butter, you probably don't need a menu or web site to tell you that you've probably got a couple hundred extra fat calories added to your dish.
That doesn't excuse restaurants from either fixing the calorie listings or fixing their preparation to better match the listings. But as the old saying goes, caveat emptor.
More about the study: "One in 5 restaurant calorie listings is off"
You might also like: "Restaurants to offer more-healthful fare for kids"
"On the Plate, a Pinch [of salt] or a Pound?"
Wednesday, July 20, 2011


Friday, March 11, 2011
Sea no evil (salmon or trout with coconut sauce recipe)
 |
| Trout with coconut sauce |
The pun is deliberate. As lent has gotten under way, Catholics spend several weeks eating no meat (at least not from land or air) on Fridays and heading for the fish counter.
The problem is that many choices, at least at my supermarkets, can be bad for the oceans (and us) in the long run. Some species, including Chilean sea bass, are overfished to the point that their populations will not be able to sustain themselves if we continue to consume them at current rates. Other species, such as Atlantic salmon, may be farmed in ways that contaminate the environment, weaken wild populations through interbreeding and disease, or consume excessive amounts of smaller fish.
If you look at seafood guides from such organizations as Shedd Aquarium in Chicago, Monterey Bay Aquarium in California, Blue Ocean Institute in Cold Spring Harbor, N.Y., and Natural Resources Defense Council, based in New York City, it's easy to get overwhelmed. But they all seem to consistently name certain fish as bad choices. The ones I see most often where I live:
Atlantic salmon
Atlantic salmon in the wild is considered endangered by the U.S. Fish and Wildlife Service. Most Atlantic salmon sold to consumers is farmed in pens that are open to the ocean and release waste and parasites into the wild. Additionally, the Environmental Defense Fund warns of elevated levels of PCBs in farmed salmon. Instead of buying Atlantic salmon, choose wild Alaskan salmon. Alternatives to salmon include char and farmed rainbow trout.Chilean sea bass
Chilean sea bass, which is not a bass but a toothfish, is overfished and especially vulnerable because it takes a long time to reach reproductive age. Consumers need to beware elevated levels of mercury. The usual fishing methods damage the sea floor and can kill endangered albatross and other sea birds. Further, the overfishing of Chilean sea bass is implicated in the decline of a population of killer whales in the Ross Sea, off the coast of Antarctica. The Monterey Bay Aquarium suggests consumers look for Pacific halibut or sablefish (also called black cod). The Marine Stewardship Council, based in London, has certified a small Chilean sea bass fishery as sustainable, but I've never seen any offerings with the council's blue seal of approval.Eel (also sold as unagi)
Until very recently I ate Japanese style unagi because my local Asian food market sold frozen precooked unagi that was ready to eat after minutes of reheating. I didn't know that the overwhelming majority of eel sold is farmed in ways that threaten the wild population and send waste into the environment. So much for my uber-convenient meals. But there are other fish in the sea.Orange roughy
Orange roughy, sometimes called red roughy or deep sea perch, is very long-lived and can take 30 years to mature, meaning they often are caught before they've had a chance to reproduce. Populations are badly overfished according to many groups. As with Chilean sea bass, orange roughy can contain elevated levels of mercury.Others to avoid include shark, swordfish, blue fin tuna, red snapper, Atlantic cod, Atlantic halibut, Atlantic flounder and Atlantic sole.
As I've said, there are other fish in the sea, and the seafoods that most groups say are particularly good choices include U.S. farmed tilapia, U.S. farmed catfish, farmed rainbow trout, farmed Arctic char, wild-caught pink shrimp from Oregon, wild Alaskan salmon, dungeness and stone crabs, and farmed mussels, clams and oysters.
 |
| Salmon with coconut sauce |
Salmon (or Trout) With Coconut Sauce Recipe
Serves 4
INGREDIENTS
1 Tablespoon canola or peanut oil
1 pound wild Alaskan salmon* or farmed rainbow trout fillets
1 Tablespoon canola peanut oil
2 scallions, chopped
1 small to medium shallot, chopped
1 clove garlic, chopped
2 to 3 teaspoons green curry paste**
1 Tablespoon chopped ginger
1 Tablespoon chopped lemongrass
1 well-shaken can (13.5-ounce) coconut milk
1 Tabespoon fish sauce
1 roasted red bell pepper, chopped or cut into strips
DIRECTIONS
1. Heat oil in hot skillet, add fish and cook just until flesh flakes apart. (Time varies depending on thickness of fish.) Remove fish to plate and tent with foil.
2. Add oil to same pan used to cook fish. Saute scallions, shallot, garlic, curry, ginger and lemongrass until fragrant, about a minute. Add coconut milk and simmer until slightly thickened. Add fish sauce and red pepper. Serve with fish and brown jasmine rice. This goes well with Thai style cucumber salad.
NOTES:
*I prefer fresh fish, but I've done this dish with canned salmon too. Canned salmon is already cooked.
**Two teaspoons curry paste make the sauce mild because I serve this to toddlers. For your own taste, sample the sauce and adjust seasoning as needed.
For more information on seafood sustainability:
Shedd Aquarium's Right Bite wallet guide
Monterey Bay Aquarium's Seafood Watch program
Natural Resources Defense Council
Blue Ocean Institute's seafood guide
Greenpeace International Seafood Red List
World Wildlife Fund's international seafood guides
Related news:
Costco Wholesale Corp., in its seafood policy updated last month, said it will stop selling "certain wild species that have been nearly universally identified as at great risk." Those include Atlantic cod; Atlantic halibut; Chilean sea bass; Greenland halibut; grouper; monkfish; orange roughy; redfish; shark; skates and rays; swordfish; and bluefin tuna. Costco said it won't resume sales unless sources are certified as sustainable by the Marine Stewardship Council (MSC). The move followed a highly public campaign by Greenpeace last year.
A California bill would ban the sale and possession of shark fins.
Monday, February 14, 2011
Sweet day
If it were up to me, the only gift acceptable or traditional on Valentine's Day would be chocolate. Just try eating roses, diamonds or lingerie. Well, maybe I should leave the latter off the list. There are purportedly edible versions, BUT ...lingerie isn't really a gift for the recipient anyway.
Here's to chocolate.

My husband bought me the chocolate pictured. He knows me. Sweet.
Here's to chocolate.

My husband bought me the chocolate pictured. He knows me. Sweet.
Wednesday, February 2, 2011
Wrapping up another year (dumpling recipe)
 |
| These dumplings tasted delicious in spite of improper folding. |
Gong xi fa cai, xin nian kuai le, or happy new year, everyone!
The eve of the Chinese New Year found the family and me snowbound. The only thing I forgot to pick up before the storm was a package of dumplings, or jiao zi, for our dinner to celebrate the arrival of the Year of the Rabbit.
That's almost like forgetting the stuffing or dressing to go with the Thanksgiving turkey. Heck, it may even be like forgetting the turkey in my home.
 The only thing to do was make them from scratch, including the wrappers, or skins, for each dumpling. I've seen dumplings made, but when I was growing up my only contribution was eating the finished result. More recently, when I did make them occasionally, I usually bought a package of already-made wrappers. Oh, well. There's a first time for everything. I wasn't about to give up on my favorite traditional food for such an important holiday.
 The filling was easy. In the refrigerator I had half a pound of ground pork that I originally planned to use in chili or empanadas. Pork was just what I needed for the dumplings, which I planned to pan fry until the bottoms were golden and crisp. When prepared that way, they are guo tie, or pot stickers. You can also steam them on a cabbage leaf or boil them. I like the crunchy bottom, so I fry them.
To go with the pork, I had some leeks (use garlic chives if you find them), napa cabbage and ginger. In the pantry were about 10 pounds of all-purpose flour, way more than enough to make the dough. The Year of the Tiger may have lashed us with a blizzard on its way out, but even if the weather outside was frightful, the food was so delightful.
Pork Dumpling Recipe (Guo Tie)
Makes 20 to 24
INGREDIENTS
filling:
1 cup chopped napa cabbage
1/2 pound ground pork
1 cup chopped leek
2 Tablespoons finely minced fresh ginger root
2 Tablespoons low-sodium soy sauce
1 Tablespoon rice wine
1 Tablespoon corn starch
wrappers:
2 cups all-purpose flour
1/2 to 3/4 cup warm water
DIRECTIONS:
1. For filling, sprinkle a little salt over the chopped cabbage and let sit about 15 minutes. Squeeze cabbage in your fist over a cup or bowl to extract excess liquid. Discard the liquid. Mix all filling ingredients in a large bowl, cover bowl with plastic wrap and place in refrigerator until ready to use.
 2. For wrappers, put flour in a large mixing bowl, mix water in and knead to get a moist but not sticky dough. I had to use 1/2 cup plus 2 1/2 Tablespoons water. The amount you need to get a dough that will hold together may vary, depending on the type of flour you use. King Arthur all-purpose, flour, for example, has a higher protein content than something like White Lily brand. Lower protein flours may not soak up as much water.
 3. Cut the dough in 2 or 3 strips, roll into logs, about an inch and a half thick, and slice into 1/2-inch thick "coins." On a floured surface, roll out the pieces into circles about 3 inches in diameter. Lightly dust with flour. (My first several circles stuck together because I just piled them on a plate. I was able to separate the ones I later floured.) Place wrappers on a plate and cover with a damp (not wet) kitchen towel to prevent them from drying out.
 4. To fill the dumplings, put about 1 Tablespoon of filling in center of wrapper, fold wrapper into half circle, pressing center of outer edges together. Pleat one side, pressing the pleated edge to the unpleated edge as you go. (The pleated edge should be on the outside curve of the dumpling. You might want to look at someone else's until I can make another batch and take more pictures. I pleated this batch backward. Hey, cut me some slack. I shoveled snow for two hours.) Lightly flour bottom of dumpling and place on plate. Cover with damp towel to prevent drying. Repeat with rest of wrappers. This recipe should make roughly 20 dumplings. Dumplings can be frozen at this point, and cooked later.
 5. To pan fry dumplings, heat 2 Tablespoons peanut oil in a 12-inch nonstick skillet over medium-high heat. Arrange dumplings bottom down, pleats up, in pan. Allow to sizzle half a minute to a minute, then add 1/2 cup water to the pan and cover immediately. When water has evaporated, add another 1/2 cup water. When water has evaporated a second time, continue cooking dumplings until the bottoms are golden (their shape is supposed to suggest that of gold ingots as a symbol of prosperity for the coming year). Place a large plate upside down over dumplings, and holding plate in place, invert the pan so that the dumplings are bottoms up on the plate. (Please do this with care to avoid unfortunate incidents such as burning yourself or dropping a heavy skillet on your foot. Oh, and try not to drop dumplings on the floor.)
Serve with dipping sauce of your choice.
Sauce that I use:
Dipping Sauce Recipe
INGREDIENTS
1/4 cup soy sauce
2 Tablespoons black vinegar
2 Tablespoons water
2 teaspoons sugar
1/2 teaspoon sesame oil
green portion of one scallion, chopped (or some chopped fresh cilantro)
1/2 teaspoon sriracha (pepper sauce) or chili flakes, optional
DIRECTIONS
Place all ingredients in a small bowl and mix.
You may also like: Mom, Mooncakes and the Mid-Autumn Festival
Tuesday, February 1, 2011
Soup dreams
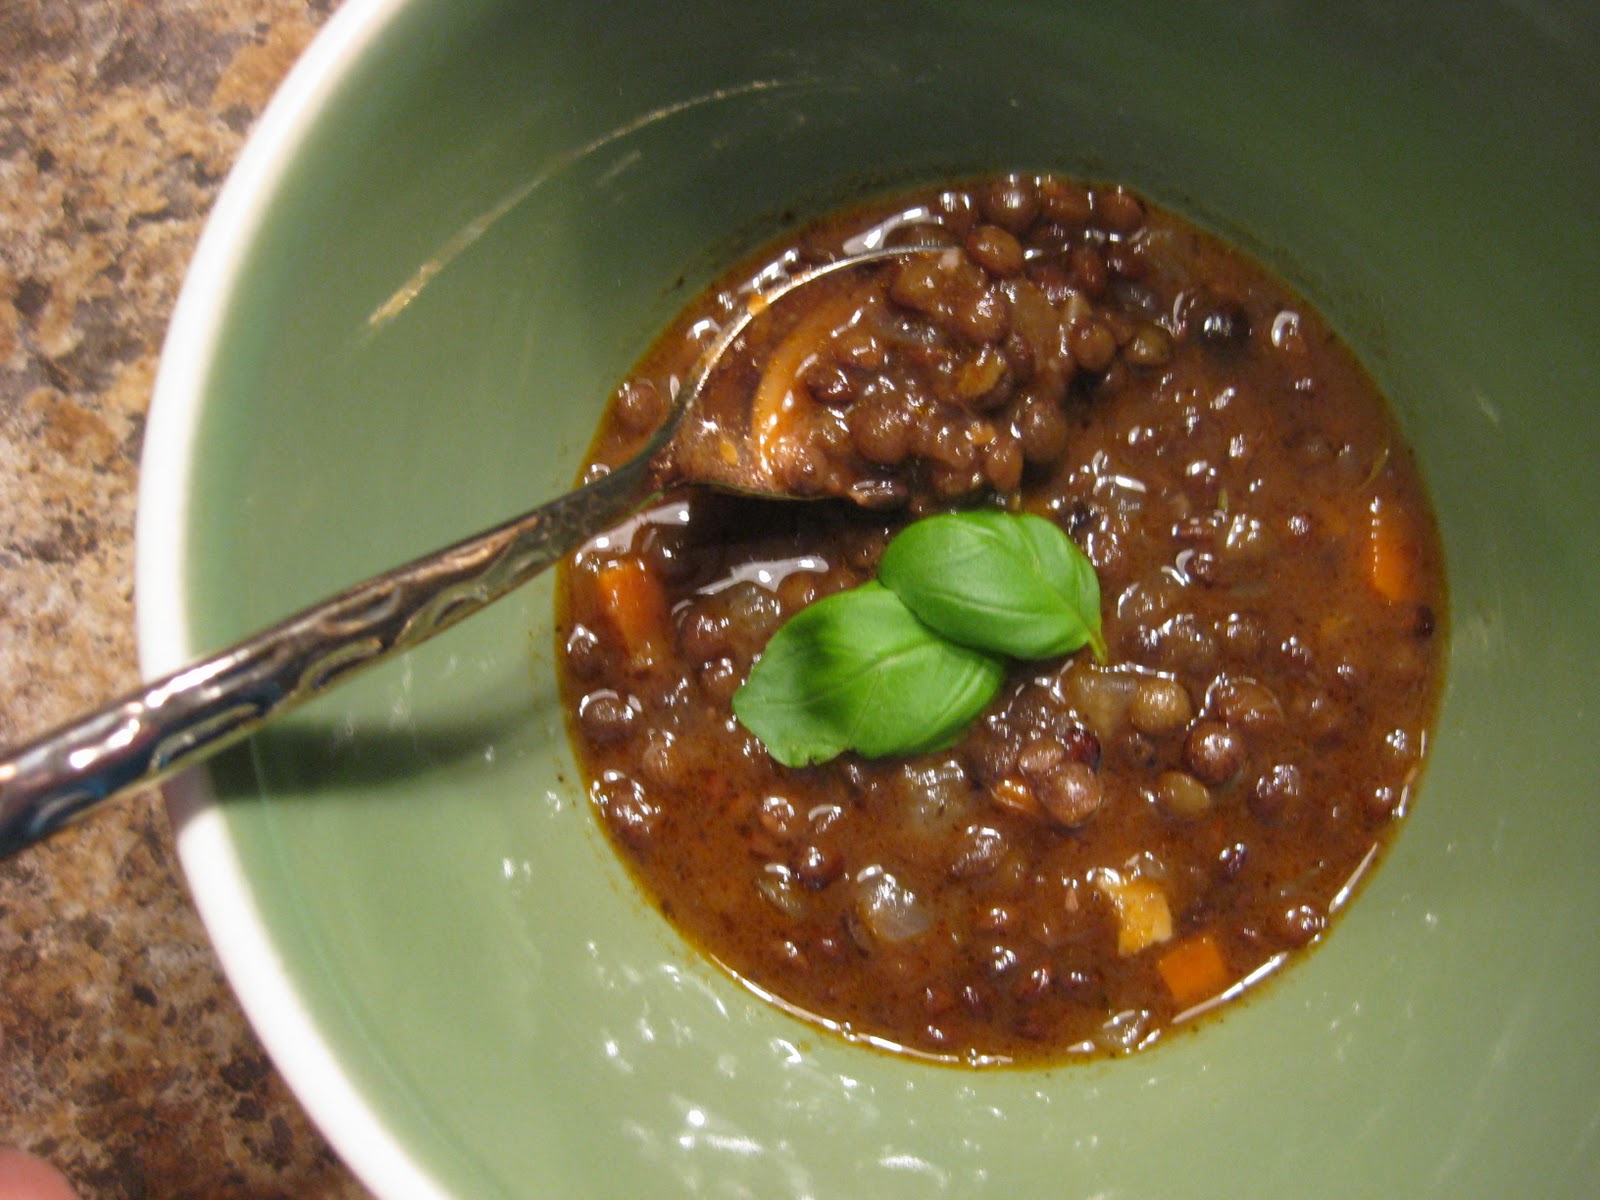
A blizzard is whipping the house, it's effectively 4 degrees below zero outside with the wind chill, and the family and I are relaxing. We don't have to be on the roads, and there's plenty of food to keep us fed for a couple weeks.
Not so long ago I was one of those people who rushed to the supermarket the day before a major storm (or even after the deluge of flakes started) to grab what I could for the next couple of days.
Since then, I've learned to keep some staples in the kitchen, not because Mother Nature might trap me at home but because having a full pantry makes life easier. (And, yes, when a storm blasts in, I don't have to rush to the supermarket to scavenge supplies.)
When I'm not inspired to make anything particular or I haven't had time to do my regular shopping I can still have a good meal. Sometimes it's a burrito stuffed with beans, rice and leftover meat or vegetables; sometimes it's a pasta salad bright with lemon vinaigrette and roasted red peppers; sometimes it's soup. Homemade soup tastes better than the stuff sold in cans, and even a non-cook can make it pretty easily. A bonus is it's more healthful.
Just yesterday the U.S. Department of Agriculture and Department of Health and Human Services announced the new Dietary Guidelines for Americans, saying that we as a nation need to eat fewer calories, less salt, less added sugars, and more vegetables, fruits and whole grains. When it comes to salt, processed foods, especially most ready-to-eat soups, are big offenders.
Not only do most canned soups contain a lot of sodium per serving, the serving size printed in small type on the back of the can doesn't reflect what people normally consume. For instance, those microwavable bowl-like containers of soup that people take to work look like a single serving. One "bowl," one serving, right? Nope. But who eats just half or shares the bowl with a co-worker? So when figuring the amount of sodium you get from one of those, you may as well double the number on the label, which means you've consumed more than 800 milligrams in a low-sodium soup, or more than 1500 milligrams in a bowl of regular soup, exceeding some people's recommended maximum for an entire day under the USDA guidelines.
 |
| You can control the salt. |
Last night, we had lentil soup (very similar to my lentil stew) with braised lamb shanks, which give a wonderful flavor to the soup. If I weren't using the lamb shanks, I'd probably brown some sausage (merguez or chorizo would work), good bacon or pancetta and use that as the meat component. Or you could skip the meat and use vegetable stock in place of water. Except for the lamb, all the ingredients are things I keep on hand.
Among the things I nearly always have: dried split peas and lentils (green and red), canned and dried beans, noodles, rice, all-purpose flour, canned fish (sardines, tuna and wild red salmon), canned tomatoes, canned coconut milk, peanut butter, chicken or vegetable stock, frozen vegetables, fresh carrots, potatoes, onions, shallots, scallions, ginger root, lemon or lime, and, of course, soy sauce, olive oil, butter and some vinegar. What kinds of pantry staples do you keep around? Or what do you like to make when the weather outside is frightful?
Lentil Soup With Braised Lamb Shanks Recipe
Serves 4
INGREDIENTS
2 Tablespoons butter
2 lamb shanks
one medium onion, chopped
1 stalk celery, chopped
1 carrot, chopped
2 cloves garlic, smashed
1/2 teaspoon dried thyme
1/2 cup good red wine
4 cups water
1/2 cup to 1 cup tomato sauce (I use leftover sauce, but you can use canned chopped tomatoes or tomato puree and add some of your own oregano or basil, etc. if you want)
1 cup French green lentils* (about 8 ounces, or half a pound), picked through and rinsed
4 lemon wedges, to squeeze over each bowl, optional
DIRECTIONS
1. Melt butter over medium-high heat in a heavy 4 quart pot or high-sided 12-inch pan (whichever is large enough to hold the shanks). If butter starts to burn, lower heat. Season shanks with salt** and pepper and place in pan, browning on all sides. Don't worry about browning the entire surface perfectly. You just want some browning for flavor. Remove shanks to a plate.
 2. With heat on medium to medium low, saute onion, celery and carrot until onion pieces turn translucent. It's okay if edges start to turn golden, but you don't want to burn the vegetables. Stir in garlic and thyme, letting them cook about a minute.
 3. Add wine, water and tomato sauce to pan, scraping any brown bits from bottom. Stir in lentils, then return shanks to pan along with any meat juices. Bring soup to boil, then reduce heat to lowest setting, cover and let simmer until lamb is cooked, about an hour and a half.
4. Remove meat from shanks, pull apart or cut into pieces and return to soup. Discard bones.
NOTE:
*French green lentils tolerate the long cooking time without turning to mush.
**When you salt food, be aware that one half teaspoon contains about 1200 milligrams of sodium. Also keep in mind that some ingredients, such as canned tomatoes or tomato sauce, usually contain added salt.
Monday, January 10, 2011
Braised leeks with lemon vinaigrette

When my husband and I went to Paris (while we were still dating), we went to an old-fashioned little neighborhood restaurant that we had found. I don't remember how we found it, but we had heard that the former prime minister liked the place and we wanted to check it out.
Since we were in the neighborhood, and it was a weekday and we were early (and presentable) for dinner, I figured we could swing by and see if it was busy. If not, we'd drop in. If it was packed, we'd just call the next day for a table.
Only one of maybe a dozen small tables was occupied, so I asked the host about dinner. "Non, non, non! We have no table for you. You must have a reservation," the older man responded in French, looking at us as though we had tried to crash a royal wedding. My husband and I looked at each other, then over the man's shoulders at one couple and nearly a dozen empty tables.
In New York, we might have walked out and kept going. But it occurred to me that maybe walking in off the street wasn't something a diner did at an old neighborhood restaurant here. When in Rome ... er, Paris ...
I asked the host for the telephone number, he gave us a card, and we went for a little walk. In less than five minutes we found a public telephone, made the call to find out when we could make a reservation and found out that we could come for dinner in 15 minutes, OF COURSE.
Back at the restaurant the man greeted us as though we were regulars. "Come, come," he said with a smile, seating us, then bringing a small glass of white wine to each of us. In other words, we had learned our manners. I guess at sit-down restaurants in Paris, they don't want some tourist to walk in as if the place were some lowly McDonald's.
And when the host presented us with an appetizer of braised leeks, I also learned that the mild member of the onion family was worth it's own dish.
I didn't have the presence of mind to ask for a recipe for the leeks (what with the free flow of wine and other things), but they weren't too hard to figure out.
Braised Leeks With Lemon Vinaigrette
Serves 4 as an appetizer
INGREDIENTS
4 leeks
1 cup chicken or vegetable stock (or 3/4 cup stock plus 1/4 cup dry white wine)
1 teaspoon mustard
2 Tablespoons lemon juice
4 Tablespoons olive oil
1 teaspoon chopped fresh thyme
salt and freshly ground black or white pepper
DIRECTIONS
 1. Clean the leeks. Start with a rinse under running water to remove dirt from the roots (but don't cut off the roots) and strip off the outer layer. Then cut off the tops (dark green parts) that are too ratty to be used for anything at all.
 Keeping the root end intact, slice the leek in half lengthwise, starting about half an inch from the roots going toward the top. Under running water, gently separate leaves just enough to rinse out the dirt and grit. When the leek is clean, trim the rest of the tops and save them for making stock. Sometimes the inner leaves higher up are lighter green and more tender.
  Those can be chopped and saved for cooking fish. (I keep my chopped leeks in little plastic bags in the freezer.)
Finally, trim the root end before putting the leeks into a medium pot (about 1 1/2 quarts to 2 quarts) together with 1 cup of chicken or vegetable stock.
2. Bring stock with leeks to boil, then reduce to simmer and cover. Simmer about 20-30 minutes, or until leeks are very tender, and remove from heat.
3. In a glass measuring cup or small bowl, whisk together mustard and lemon juice. Gradually add olive oil while continuing to whisk, then add thyme and a pinch of salt and pepper. Taste and add more salt if desired.
4. When ready to serve, place each leek on a small plate and spoon vinaigrette over the top.
This is a good appetizer or side dish with chicken, fish or egg dishes, such as quiche. It's also good as a snack with fresh baguette and a glass of white wine.
NOTE: Instead of making a lemon vinaigrette, you could reduce the stock, add a bit of butter and seasoning to finish the sauce and pour that over the leeks.
Thursday, January 6, 2011
Homemade Galette des Rois for Epiphany
 |
| A galette des rois, or king cake, is relatively easy to put together. |
When I was 5 years old my family moved to an apartment complex in St. Louis, Mo., where my mother got to know a French Canadian woman and I got to play with her daughter, Nathalie.
One evening we went to visit and played what to me was the coolest game. My parents and I and Nathalie and her parents sat around a table for dessert. Nathalie's mother gave us a piece of a king cake, and told us whoever found a little figure inside, I think it was a baby, would wear a crown and be king or queen for the party.
I don't remember how I ate it, whether I used a fork or my hands. I don't even remember what the cake was like. All I remember is the anticipation, the tension as I took careful bites hoping I'd find the prize, without swallowing it. I wanted to wear that crown. I don't recall how much I ate, but I found the trinket.
Of course, looking back, I realize that Nathalie's mother must have rigged it so that I'd win.
A year later, we moved again, nearly haflway across the country, losing touch, and for a while I forgot about Nathalie and the cake.
 Recently, I kept coming across references to French king cakes, called galette des rois and gateau des rois, traditionally eaten to celebrate the Epiphany, which marks the visit of the three wise men or kings to the infant Jesus. Who am I to ignore what fate keeps putting in front of me? Since the Epiphany falls on Jan. 6, I made a galette des rois this past weekend, partly because the galette version uses puff pastry, or pate feuillete, to enclose a central layer of almond cream, which I love. (The gateau des rois is more of a brioche cake.)
You can use frozen ready-to-use puff pastry dough, but none of the supermarkets in my area carried any made with butter. As I've mentioned before when developing a pie crust for my quiche, I don't care for the feeling that vegetable shortening leaves in my mouth, so I had to make it from scratch.
The pastry dough wasn't as difficult as I thought it might be. It just took time because it needed to chill several times for an hour in the refrigerator. No biggie. I made the dough and filling on Saturday, then assembled and baked the tart Sunday. I didn't have a feve (bean) or figurine to bake into the galette, so I used a whole almond. It took longer to bake than the expected 40 to 50 minutes, and I think it could still have used a bit more time in the oven. I also had some dough and almond cream left over, so I made mini tarts too.
The tart disappeared in less time than I needed to make it. Good thing custom lets me eat these all month if I want. I can't resist the buttery aroma or the slightly sweet, moist almond filling contrasting with the flaky layers.
Galette des Rois Recipe
Serves 8 to 12
INGREDIENTS
1 cup ground almonds
1/2 cup granulated sugar
1/2 teaspoon salt
1 tablespoon flour
1 stick butter, softened at room temperature
2 large eggs
1 teaspoon vanilla extract
1/4 teaspoon almond extract, optional
1 package premade puff pastry dough (thawed if frozen)
1 large egg
Preheat oven to 450 degrees F.
1. Combine almonds, sugar, salt and flour.
2. In a large mixing bowl, stir butter until softened, then mix the dry ingredients into the butter. Mix in the eggs and extracts.
 4. Just before assembling galette, beat one egg and keep next to work area. Divide puff pastry dough in two. Roll out one portion of the dough on nonstick parchment paper to between 1/8 inch and 1/4 inch thick and cut out a large circle, using a 9-inch or 10-inch cake pan as template. Cover with plastic and refrigerate the circle. Repeat, making a circle that is 1/2 inch in diameter larger than the first circle. Cover with plastic wrap, and remove the first circle of dough when you put the second circle in the refrigerator.
5. Place the first circle of dough on a parchment-lined baking sheet. Brush outer inch of the circle with the egg wash. Spread the almond cream over the first circle of dough except the outer edge that has been brushed with egg. Press a whole almond into a random spot of the almond cream.
 6. Get the second circle of dough, put it over the first, and press the edges to seal them shut. Use a knife to score curved lines radiating from the center to the outer edge, without actually cutting through the dough.
Then cut a steam hole in the middle of the tart and brush the surface with egg wash.
7. Bake at 450 degrees F. for 10 minutes, then lower the oven to 400 degrees F. and bake the galette until puffed and golden brown, about 40 to 50 minutes, but check on the galette at 20 and 30 minutes. If it is getting dark too quickly, cover with a sheet of foil to shield the top.
8. When done baking, put the baking sheet on a cooling rack and allow to cool 15 or 20 minutes. Cut into wedges and serve warm. I also like to eat it for breakfast the next day.
Wednesday, January 5, 2011
Baby Steps on Road to Improvement
 |
| Cornmeal-coated tilapia with couscous, lemony carrots and green beans |
I may not make New Year's resolutions, but that doesn't mean I think my self improvement is done. It's just that I'm constantly reflecting on myself and how I can continue to grow, learn new skills, make smarter decisions, treat people and the planet with respect and be a better person in general. Shouldn't those aspirations guide me every day and not just once a year?
Symbolically I understand the urge to make the annual resolution. New year, new start. And for some people, the grand resolution may inspire great resolve. As for me, it's more effective to think of each day as a clean slate. If one day doesn't work out so well, then the next day I can start over, like Bill Murray in "Groundhog Day." There won't be a dramatic transformation as in "Extreme Makeover." It'll be more like a recipe you're working on. Each time you test it, you tweak it and make little improvements. Eventually you end up with something to feel good about.
Among my ongoing improvements is putting more thought into where my food comes from and the impact on the environment. I know many people are way ahead of me on this, but better late than never, no? Of course, here in the frigid Midwest winter, buying in season and local is a little different than it would be in California, where you'd be able to get produce from within the state, even from a farmers market, at any time of year. My choices are more like apples from two states away or cherries from a continent away. I choose the apples.
At the fish counter, I tend to have a little more trouble. I know I should steer clear of orange roughy and Chilean sea bass (both of which were on ice last week at the supermarket), but is trout okay? Does it matter whether it is wild or farmed, as it does with salmon?
 |
| Canada-farmed rainbow trout pan fried with teriyaki sauce |
It turns out U.S.-farmed tilapia and farmed rainbow trout are good choices, according to the guide. But lake trout could be okay or not, depending on which lake it came from. And Central American-farmed tilapia is supposed to be a good alternative to U.S.-farmed, but Asia-farmed tilapia is not.
I ended up buying farmed rainbow trout from Canada and tilapia farmed in Central America. I didn't really have a recipe for either. I just fried the trout, adding teriyaki sauce toward the end of cooking. The tilapia I seasoned with salt and pepper, dusted with cornmeal and pan fried in a little butter and olive oil. I finished with a squeeze of lemon (I've done lime too) and served it with herbed Israeli couscous, green beans and pan roasted carrots dressed with a lemon vinaigrette (recipe below).
I'm not deluded. I realize that my individual decision to pass up the Chilean sea bass and fry up the trout is not going to save the planet. But as my knowledge grows, hopefully, my improved choices will add up, and I can also help educate friends and family, whose choices will add up, and so on. If I'm successful, we'll maybe help the Earth in our small way, or at least not contribute to messing it up.
Lemony Balsamic-Thyme Vinaigrette for Roasted Carrots
I really think the brightness of this dressing complements the naturally sweet vegetable better than a sugary or syrupy glaze. This makes enough for at least two pounds of carrots.
INGREDIENTS
1 Tablespoons balsamic vinegar
1 Tablespoon lemon juice
1 teaspoon mustard
4 Tablespoons olive oil
1 tsp chopped fresh thyme
1 tsp grated fresh lemon zest
1/2 teaspoon salt (adjust according to preference)
1/4 teaspoon freshly ground pepper
DIRECTIONS
1. Whisk together balsamic vinegar, lemon juice and mustard, then gradually drizzle in the olive oil while constantly beating. Whisk in the thyme, lemon zest, salt and pepper.
2. Spoon about half the vinaigrette over two pounds of roasted carrots. Taste and add more dressing if desired. The dressing can be made ahead, but carrots taste best served right after being dressed.
This also is good for making a roasted carrot and potato salad.
Monday, January 3, 2011
Hope for 2011: Sense and Sensitivity

I have high hopes for every year, 2011 being no exception. If I didn't, then what would be the point of going on?
Of course, I won't hold my breath for some things. For example, I hope that more people learn to use some common sense, which is rather an oxymoron isn't it? Sense is very uncommon. I'm not talking about intelligence. Sure we could use more intelligence to go around. But the really rare commodity, even among pretty smart people, is good judgment.
I think about this when I see an attempt at using wit to catch someone's attention. I'm not talking about irreverence or even obnoxious humor in the right context. On the other hand, when you're addressing a general audience of millions of readers, is it really so clever to play off of a historical event with millions of victims, who probably wouldn't find much to pun about in the terror, torture and death they endured?
Friday morning I came across the newspaper headline "Cultural Resolutions" and was a little surprised that editors thought it would be fun or clever to make a pun with the Cultural Revolution. Sure, it takes a bit of wit or skill with language to create a pun. A bit.
But would those same editors give the green light to a headline such as "Retail Holocost: Big box company's low prices wipe out small stores"? (After all, it's just playing with the reference to the Holocaust and not even spelling it the same way. Would they be Shoah it would pass a good taste test? This ridiculousness is just to make a point, in case I haven't been clear.)
How about "The Shilling Fields: Sports event revenue grows with memorabilia sales." Was the Khmer Rouge so bad that we can't try to lighten things up a bit? In fact, wouldn't it be terribly clever for a cosmetics company to introduce a beautiful blood-red lipstick and name the shade C'mere Rouge?
I do think the news media should have the courage to offend someone -- if it serves a purpose. But if the only reason for giving a big fat middle finger to people who still bear the physical and psychological scars of a horrific event (not to mention the dead) is that a writer or editor can't think of something smarter, then I see failed judgment, or at least laziness. Isn't the motto of a journalist supposed to be "Comfort the Afflicted and Afflict the Comfortable," not "Afflict the Afflicted"?
 Friday wasn't the first time I had seen a "witty" reference to the Cultural Revolution. At one of my local supermarkets last year I came across Cultural Revolution yogurt. Yes, I get it, yogurt is a cultured product, and the company described this one as "revolutionary in every way, including its appearance and texture." I was open minded enough to buy a cup of it just so I would know whether it was a great-tasting product in a tasteless package. Turns out, it was good, but not my favorite and not amazing enough for me to swallow my objection to the name.
But while I'm pragmatic enough not to hold my breath waiting for sense to prevail, I always have hope, and in this case it was justified. This past fall, the maker of Cultural Revolution yogurt rebranded its product Kalona SuperNatural.
If anyone still doesn't understand why I oppose frivolous puns that refer to the Cultural Revolution, then maybe a few recollections from survivors will at least offer insight into my point of view.
In a BBC report, one family member of a victim recalled, "My mother was also severely beaten because of my father. It was so bad there was blood in her urine."
Another survivor said, "Around that time people were dragged out and shot in large numbers in Shanghai - sometimes 50 people in one go."
One compelling account is in "Life and Death in Shanghai," by Nien Cheng, a memoir that details her years of solitary confinement and torture in prison during the Cultural Revolution. When she finally did get out, she learned that her only child, her daughter, had died at the hands of the Red Guard. If Cheng, who died a little more than a year ago, had lived to see the headline flippantly playing off the horror that she endured and that her daughter didn't survive, I can't imagine what she would have thought.
A University of Chicago scholar who lived through that period, Youqin Wang, said during an interview that to some people "Chinese victims’ lives are cheaper than those of other nations." I hope that's not true.
When I see a newspaper headline, blog post, brand name or online comment that seems to lack judgment or taste, sometimes I wonder whether the author gave it any thought. When people turn something like the Cultural Revolution into nothing more than an easy pun, I wonder whether they know what the Cultural Revolution was, not to mention any other modern history. If so, did they weigh the pros and cons and make a conscious judgment that the negatives are worth it? And would a person with any class be able to look someone in the eye and say in person what they wrote anonymously?
Thursday, December 30, 2010
Spinach Bacon Quiche

I love eggs in just about any form, so it's inevitable that they show up on my table at all times of day. It doesn't hurt that they are so easy to prepare, which is a nice break from some of the other cooking projects I've had during the holidays. Sometimes I make bacon, egg and cheese sandwiches. Sometimes I have soy sauce eggs with rice or noodles. And then sometimes I bake quiche.
The first time I tasted quiche was in my seventh grade French class. Our teacher, Mrs. D, wanted us to absorb some culture as well as conjugations. She perched a beret over her curly auburn hair (it was clichéd even back then, although adorable on Mrs. D), read French poetry, played French records (so help me, I'll slap anyone who asks me what records are), and brought in Evian water and Brie cheese (they were exotic at the time). She also fed us quiche.
Since then, quiches have become hip, then passe, and now ... I don't know what their current status is, and I don't care. Just let me have the eggy, custardy, cheesy filling in a buttery crust. Did I mention the bacon? I'll be quiet for the two minutes it takes to inhale my share.
 |
| Ham and cheese quiche with broccoflower gratin and braised leek |
I've made some pretty good crusts, but I'm still experimenting. A recipe that I've been tinkering with for several months replaces one-third of the butter with olive oil (see recipe below). The olive oil helps coat the flour for a more tender crust. It's also more healthful, not that I'm afraid of a little butter or cream, as you can see from the quiche ingredients.
The vodka adds moisture to the dough without helping the gluten form. Gluten, which forms when water mixes with wheat flour, means structure, but it can also contribute to toughness. The vodka wasn't my innovation. A few years ago, Cook's Illustrated published a vodka pie dough recipe that attracted a lot of attention. For me, that dough was a little too wet and sticky to work with. But the idea of using vodka was good, so I incorporated that into my own crust.
Spinach-Bacon Quiche Recipe
Serves 4 adults
INGREDIENTS
1 crust (recipe below)
1 cup shredded cheese (I like to use a combination of cheddar and swiss)
1 package (10 ounces) of frozen chopped spinach, drained*
4 to 5 slices of cooked bacon, crumbled (or 1/2 cup chopped ham)
6 large eggs**
1/2 cup heavy cream (or creme fraiche)
1 cup milk
1/2 teaspoon salt
1/2 teaspoon freshly ground pepper
DIRECTIONS
1. Preheat oven to 425 degrees F. Bake crust (recipe below).
2. While crust is baking, cook spinach, then squeeze out liquid. After removing crust from oven, immediately sprinkle half to two-thirds of the shredded cheese all over the bottom of the crust and allow to cool on rack. Lower oven to 375 degrees F.
With fingers, break up the spinach and sprinkle it evenly all over the bottom of the crust. Drop bacon pieces evenly over the spinach, then the rest of the shredded cheese.
3. In a 4-cup measuring cup or in a mixing bowl, beat eggs. Add cream, milk, salt and pepper, and beat until combined. Pour mixture into the crust, taking care not to overfill. Depending on the size of the pie dish, you may have extra filling.
4. Place quiche on a baking sheet, then bake until center barely sets, about 40 to 50 minutes (adjust time depending on the oven). Serve with salad, soup or cooked vegetable. We recently had spinach-bacon quiche with leftover potato gratin and ham and cheese quiche with broccoflower gratin.
 |
| Use ham instead of bacon if that's what you have. |
**Leave out a couple yolks to reduce the cholesterol.
Pie crust recipe for quiche
makes a 9-inch deep-dish bottom crust
INGREDIENTS
2 cups all purpose flour*** (275 grams, or a shade under 9 3/4 ounces)
1/2 teaspoon salt
1 stick (1/2 cup, or 4 ounces) butter, very cold, cut into half-inch cubes
1/4 cup olive oil
5 to 7 Tablespoons ice water (5 Tablespoons worked for me)
1 Tablespoon vodka
1 teaspoon vinegar
DIRECTIONS
1. Put flour and salt in bowl of food processor and pulse to combine. Add half the butter and all the olive oil, and pulse until the butter pieces resemble sand. Scrape down sides of processor bowl if needed. Add remaining butter and process until the butter pieces are about the size of peas. (If you don't have a processor, use your fingers or a pastry cutter to work butter into the flour.)
2. Dump contents of processor into a large (4.5 quart or 5 quart) mixing bowl. Put 5 Tablespoons of the ice water together with the vodka and vinegar in a cup. Using a fork, stir the liquid into the dough until it clumps. Give it a squeeze with a clean hand. If dough crumbles instead of holding together, add water, half Tablespoon at a time. If it holds together, shape into a disk, wrap in plastic and refrigerate at least 30 minutes.
3. After dough has rested, roll out and fit into a 9-inch deep-dish pie plate or a 9- or 10-inch quiche dish. Avoid stretching the dough while placing it in the pie plate or it will be more susceptible to shrinkage. Trim dough about 1/4 inch outside the edge of the pie plate. (I usually have enough extra dough from the trimmings to make a toaster pastry.) Then crimp the edges. Poke bottom with a fork and place in freezer 30 minutes.
4. With the rack in lower third of the oven, preheat oven to 425 degrees F. Bake crust until it turns golden, about 25 minutes. You may have to cover the perimeter with a pie crust protector or foil while the bottom bakes through. If the bottom starts to balloon up, pierce with the tines of a fork and use the back of the fork to press the bottom back down. (I haven't had this problem lately, but it could be just luck. If you want, you can line the crust with buttered foil weighed down with pie weights or dried beans for about the first 15 minutes.)
5. Remove crust from oven and set on a rack.
NOTES: ***I use King Arthur unbleached all purpose flour, which is available at my supermarket. There are other good flours, but if the protein content is different, they may require different amounts of liquid. I recommend weighing ingredients for baking, although I know it isn't always possible or convenient. If using cups to measure flour, I fluff the flour then spoon it into the measuring cup before leveling it with a straight edge, such as a knife.
Sunday, December 19, 2010
Pineapple Isn't Citrus (Not that there's anything wrong with that)
 |
| A pomelo and lemons. |
Since when is pineapple considered citrus? At least since yesterday for The Wall Street Journal, which featured a story and "recipes that unleash the sweet power of citrus," including instructions for fritters in which pineapple is the only fruit.
The reporter wrote, "It's fitting that chefs looking to play around with produce turn their attention to fragrant citrus—tangerines, pineapples, grapefruits, Meyer lemons and especially sweet oranges—when the fruits are in their prime." Pineapples?
I turned to my husband watching TV on the couch next to me and said, "This has to be wrong. Pineapple isn't citrus." Half listening, he asked, "It isn't?" His response surprised me. I had thought the differences were obvious. Oranges, lemons and other citrus fruits grow on trees, are mostly full of little sacks of juice (vesicles) and have fragrant, dimpled skin that's pleasant to touch. Pineapples come from a herbaceous plant, have a hard, rough skin and are crowned with a mass of spiky leaves. I opened my copy of "On Food and Cooking: The Science and Lore of the Kitchen," by Harold McGee, and confirmed that pineapples are indeed unrelated to citrus fruit.
I also did some online checking and came across questions from multiple people asking whether pineapples are citrus fruit. Apparently, people get them confused.
Yes, pineapples are fruit, as are oranges, lemons, grapefruit, etc. They pleasingly blend tartness with sweetness. They thrive in warm climates. But citrus plants are members of the family Rutaceae, and pineapples are members of the Bromeliaceae family, which includes Spanish moss and several common houseplants.
So there. That's straightened out, and we can move on.
A nice way to use pineapple is in a banana pineapple cake from Bon Appétit. I skip the nuts and the frosting and add some extra drained pineapple to the batter. For me the recipe makes a dozen muffins and one 9-inch round cake. The cake is good served with a little whipped cream and sliced fresh bananas or strawberries. The muffins are good plain, served with a cup of coffee or tea.
For savory dishes, try pineapple in ham and pineapple fried rice or in sweet and sour pork chops.
A citrus recipe I like is for Tartelette's mini tarts filled with calamansi mousse and accented with candied kumquats. Kumquats regularly show up in a couple supermarkets in my area, and I found calamansi juice in the freezer section of my local Asian grocery store. If calamansi were unavailable, I'd experiment with Meyer lemons or Key limes.
Thursday, December 9, 2010
Peanut Butter and Chocolate Financiers
 |
| Small squares of chocolate are hidden in the madeleine-shaped financiers. |
Eggs are an important component of so many of my recipes, so when I found out about the salmonella outbreak in August and then the massive recall of eggs from two egg producers tied to the outbreak, I worried that the eggs I was feeding my kids were dangerous time bombs. I checked our refrigerator. Ours weren't part of the recall, but what if they were contaminated and got recalled later? I was also angry at the conditions FDA inspectors reported at Hillandale Farms of Iowa and at Wright County Egg, also in Iowa. I won't detail what the reports contain because you might lose your appetite, but you can see for yourself if you want to follow the links to the U.S. Food and Drug Administration's reports.
I threw our eggs in the garbage and didn't buy more for about two weeks.
But it was too hard to stick to egg-free dishes. I paid extra for organic cage-free eggs, and after several weeks of no additional recalls, I relaxed a little.
Apparently I'm not alone.The Associated Press reported this week that egg sales are back up after dropping about 9 percent following the outbreak. On Nov. 30, the U.S. Food and Drug Administration said Wright County Egg, which recalled 380 million eggs after it was linked to the outbreak, could start shipping shell eggs to consumers again. Hillandale got the go ahead in October to start selling eggs again.
Still, for me it's hard to trust again, so I'll continue to avoid companies with a history of problems. (I also try to be more selective with meats and produce.) I know there are no guarantees (about a month ago, another company, Cal-Maine Foods, recalled eggs from a supplier in Ohio because of the potential for salmonella contamination), but I have dinners to make and desserts to bake, including the peanut butter financiers I found in "Rose's Heavenly Cakes," by Rose Levy Beranbaum.
Like eggs, peanut butter has a particular hold on me. I love it in cookies, cake, pie, chocolate truffles, milk shakes, sandwiches, soup, sauce for noodles — just about anything. So when I saw Beranbaum's recipe putting peanut butter into the little French cakes, I had to try them almost as soon as I bought her book.
I was not disappointed. Ground almonds and browned butter in the batter enhanced the peanut flavor and helped the financiers stay moist. Plus, I pushed pieces of chocolate into the center of each cake, just as I do for chocolate-surprise madeleines — not part of Beranbaum's recipe, but I don't think I need to explain why I did it.
If you like peanut butter, try this. The peanut flavor isn't overwhelming — it's not supposed to be candy, after all — but it's definitely there. And check out "Rose's Heavenly Cakes." The color photographs show such beautiful, and to me irresistible, cakes. You'll want to make them too if you're anything like me.
Peanut Butter and Chocolate Financiers Recipe
Adapted from "Rose's Heavenly Cakes"
INGREDIENTS
3/4 cup* (75 g.) sliced almonds (the recipe said preferably unblanched, but I had only some blanched slivered almonds and some unblanched whole almonds, so I used some of both)
10 Tablespoons (142 g.) unsalted butter, room temperature
1 1/3 cups (150 grams) powdered sugar that has been sifted and spooned into the cup and leveled (I didn't have this either so I used 150 grams of superfine sugar)
1/2 cup (57 g.) sifted, bleached all-purpose flour (I have only unbleached)
4 large (120 g.) egg whites at room temperature
1/2 teaspoon salt (because my peanut butter was unsalted)
3 Tablespoons (50 g.) creamy peanut butter (the book calls for Jif)
small pieces of chocolate that can be tucked into each financier
DIRECTIONS
1. Place rack in center of oven and preheat to 375 degrees F. To make sure my oven gets up to temperature and maintains it, I keep a baking stone on the lower rack and normally preheat about 30 minutes.
Prepare financier molds or tins (if not using nonstick, then brush with melted butter). I don't have financier molds, so I used madeleine tins, which yielded 24 cakes plus enough extra batter for three small tart shapes.
2. Toast the almonds on a baking sheet for several minutes. Watch them. You want the color to darken, but don't let them burn.
3. Melt and brown the butter in a small (about 1 1/2 quart) saucepan over low to medium-low flame. When the milk solids turn brown, remove from heat because they can burn and turn black quickly. Pour butter gently into a glass measuring cup (plastic would be a bad idea here) so that you leave behind the majority of the solids and end up with 1/2 cup of the melted butter. Put it in a warm spot to keep it melted. (The book said to strain out the solids, but I have enough to clean without adding a strainer to the pile. When I'm competing on TV or writing a book, then I'll strain.)
4. Spin the almonds with the sugar in a food processor until finely ground. Blend in the flour and salt.
5. In a mixing bowl, beat the egg whites on medium speed until they look like the foam on a bubble bath (I used setting 3 on my 7-speed hand-held Cuisinart mixer, although I'd have used a nice stand mixer if I'd had it). Using low speed, beat in the ground almonds and flour. Beat in the melted butter using medium-low speed, then add the peanut butter and mix it in.
6. Fill molds about 2/3 full. I used a 1 Tablespoon rounded measuring spoon to put a 1 Tablespoon of batter into each madeleine depression. Then press a piece of chocolate into each madeleine, using the back of a spoon or your finger to smear a little batter over the chocolate to cover it. (You can skip this step if you don't want to hide the chocolate.) Normally I prefer dark chocolate, but in this particular recipe, I thought the milk chocolate pieces complemented the light peanut butter flavor better.
Bake until they turn golden. The original recipe, which used larger molds than mine, calls for a baking time of 15 to 18 minutes. Mine took 12 to 13 minutes.
7. Place the tins on a rack to cool for several minutes, then unmold the financiers onto the racks to finish cooling. (Unless you are using a silicone financier mold, in which case let them cool completely in the mold on a cooling rack.) Oh, and eat within a day or two. Beranbaum writes that they keep for three days at room temperature if you wrap them airtight in plastic wrap in an airtight container. I'm not sure in what universe they'd still be around after a couple days, so I don't bother.
NOTE: *I changed several things in this recipe, including the type of almonds used, the type of sugar and the flour, so I weighed all the substitutions to make sure I was using the correct amounts. I think this was most important when using superfine sugar in place of the powdered sugar, because the amount (weight) obtained would have been significantly different for the same cup measurement (volume). That said, it's generally a good practice to weigh ingredients when baking even when making no substitutions at all, because on different occasions you can get different amounts of an ingredient, such as flour, even when using the same measuring cup. Weighing ingredients prevents that inconsistency.
Related: The Cornucopia Institute's Organic Egg Scorecard
Monday, December 6, 2010
Toaster Pastry Tussle
 |
| The pastry cools in peace, until my son and I go for it simultaneously. |
It's been far too long, but at least I've been cooking and baking during my absence.
One of my favorite things was an impromptu Pop-Tart, er, I mean toaster pastry, that I made to use extra pie crust dough. I filled it with some pear butter sitting in the refrigerator.
I'm going to have to make a batch of dough just for these so that I have enough for everyone. My 7-year-old and I had a little tussle over this, and it wasn't pretty, the scene of a grown woman trying to sit on a little boy and wrestle away his treat. At the time it seemed fun. In hindsight, I'm not so proud of myself. But I let him keep at least half. I'm sure it was pretty close to half.
I'd post a recipe, but I used an olive oil-butter crust that I'm still developing. I'll get that posted as soon as I have that figured out a little better. But you don't need a recipe from me to make these. All you need is some dough, jam (or chocolate, or hazelnut spread, or cinnamon sugar), and an oven or toaster oven.
Cut the dough into squares or squarish rectangles, add a bit of filling, fold and seal. A little goes a long way. The pastry should look pretty flat. If you overfill it, it will ooze its filling. Not that that ruins it or anything. Poke the top with a fork to allow steam to escape, and bake at 350 F until golden. Just make sure to bake more than one.
Tuesday, November 2, 2010
Easy Peasy Split Pea Soup
 |
| Soups are a good way to use leftovers and prevent waste. |
Coincidentally, Tara Parker-Pope in The New York Times writes about wasting food just as I'm on a kick to use up leftovers instead of forgetting them.
Now that we have a preschool tuition to pay that we didn't last year, I've had to be much more conscious of our expenses, including groceries. It's easy to underestimate the cost of food, especially if you buy a little here and there throughout the week without keeping track. When you're paying attention, you realize how much the costs add up.
It isn't as though I suddenly realized wasting food was ... well, wasteful. I always peel and eat broccoli stalks, use celery leaves in a soup or stew, and cook beet greens and other veggie parts that some people throw away. I'm the only one in the house who'll eat toast made from the heel of a loaf, so I turn the ends into homemade breadcrumbs, which go into meatloaf that also incorporates leftover chopped spinach. Leftover sausage gets cut into small pieces and tossed with pasta, olive oil and broccoli rabe or beet greens. Even so, all too often I rediscover — too late — a forgotten container or a bunch of leeks in the vegetable drawer that have mushified. (Yes, I know it's not a real word, but it's a real problem.) It's easy to grab bunches of things that look amazing at the farmers market and then have no time that week to get to it all.
And that was usually my problem. I had no plan for many of my food purchases, and once they got stored at home — in the produce drawer, the pantry, etc. — it was "out of sight, out of mind." For the past couple weeks, I've been working harder on changing my habits, making sure to plan ahead what I'd prepare during the week and write my shopping list accordingly. If something I hadn't planned to buy was irresistible, I made sure to think what I'd make with it and when to do so. If something tempted me, but I couldn't think of what to make or when during the week I'd have time to get to it, then I resisted the urge to take it home.
Along those lines, I made a pea soup this past week, partly because the weather turned cold and partly because I had impulsively (old habits die hard) bought big bags of organic carrots and potatoes. Hey, they were on sale. I started out pretty well by prepping and roasting the potatoes and carrots the day I got them home. For me half the battle is not putting them in the bottom drawer of the refrigerator and losing track of them. That evening we had the veggies with roast chicken for dinner.
The next day we ate some of the leftover veggies. A couple days after that, I noticed the container of potatoes and carrots starting to migrate farther back into the fridge, getting ready to disappear behind a wall of yogurt containers.
Extra veggies can go into almost anything. I like to use them in pasta, omelets and quiches, and soups. A couple soups that take little effort and time are pumpkin-red lentil soup (to use up extra pureed pumpkin or other cooked squash) and split pea soup (to finish off potatoes, carrots and ham, if you eat meat).
Vegetarian Split Pea Soup
Serves 8
INGREDIENTS
1 Tablespoon olive oil
1 onion, chopped (about half to three-quarters of a cup)
2 small cloves or 1 large clove garlic, chopped (about a Tablespoon)
pinch of salt
1 bag dried split peas (1 pound, or about 2 cups)
2 quarts (8 cups) vegetable stock*
leftover cooked carrots (I had about a cup, but more or less doesn't matter)
leftover roasted potatoes (again, as much as you have or want)
salt
DIRECTIONS
1. In a medium (about 4 quart) pot over medium heat, stir together oil, onion, garlic and pinch of salt, and cook, stirring occasionally, until the onion turns translucent. Lower heat if it starts to brown or burn.
2. Inspect peas, discarding any stones or bad-looking peas. Put peas and broth into the pot of onion, bring to a simmer over high heat, then reduce heat and continue to simmer until peas break down and become soft, about 45 minutes.** Add carrots and potatoes, and heat about 5 minutes more. Taste and add salt and pepper if needed.***
NOTES:
* Normally I'd use water and simmer the soup with a ham hock or pieces of leftover ham, but when I don't have ham or just want a vegetarian version, I like to use vegetable stock or broth for the flavor. Use vegetable scraps to make broth and freeze ahead of time. I also keep on hand vegetable bouillon cubes. Chicken broth makes a good substitute if you aren't vegetarian or vegan.
** I think most recipes call for half or all the soup to be blended with an immersion (stick) blender or in a traditional blender. I like my soups to have some texture, so usually I don't blend.
*** Other seasonings you could use include a teaspoon of chopped fresh thyme leaves added with the carrots and potatoes, or a bay leaf added with the broth, or a teaspoon of curry powder added to the onions about a minute before the broth and peas are added. Experiment with what you like. My roasted carrots often are tossed with lemon zest and a lemon vinaigrette after coming out of the oven. If I were using plain carrots, I'd probably also add a little lemon to the soup.
Thursday, October 21, 2010
Asian Lettuce Wraps

I love easy meals, and I love meals the kids will eat. I'd say lettuce wraps filled with this sweet and savory, barely tangy filling falls into both categories. I don't have time to nag anyone to eat, and I hate - really hate - to toss perfectly good food in the garbage. An added bonus is this recipe is budget and health conscious, especially when some of the meat is replaced with textured vegetable protein.
Thank goodness this meal comes together for me every time (including today). It's been a rather accident-prone week and a half. I've been dividing my attention among the kids, some work, cooking, etc., and the lack of focus resulted in some newbie disasters. An apple tart Tatin that I've made for years just wouldn't work. I burned the caramel on the first tart. The second tart ended up under-caramelized. I burned my wrist on a hot pot. I'll spare you the entire list. I'd rather not talk about it now.
But this week is already going better. After all, Halloween - one of my favorite holidays - is around the corner and I've already gotten my skull lights out and set up. And tonight's dinner is done.
RECIPE
Asian Lettuce Wraps
Serves 4-6
INGREDIENTS
1 Tablespoon oil (canola or peanut)
1 teaspoon sesame oil
2 teaspoons grated fresh ginger
1 1/4 pounds to 1 1/2 pounds ground turkey (or beef)*
1 Tablespoon oil
1/2 medium onion or 1 shallot, chopped
5 medium or 3 large cloves garlic, chopped
2 Tablespoons brown sugar
2 Tablespoons low sodium soy sauce**
1 Tablespoon fish sauce (I use Three Crabs brand)
1 teaspoon sriracha sauce
1 teaspoon rice wine vinegar
2 or 3 scallions, chopped
1 cup cooked carrot, diced***
8 to 12 lettuce leaves (Boston and red leaf lettuce work well)
garnish: mint or Thai basil leaves and lime wedges to squeeze over filling
DIRECTIONS
1. Heat 1 tablespoon oil in a deep 12-inch skillet or wok over medium-high heat, add ginger and ground meat, and cook until just done. Remove meat to a bowl and cover to keep warm. Return pan to stove, reducing heat to medium-low.
 |
| Add onions to pan, then make sauce. |
 |
| Thai basil has a slight anise flavor. |
NOTES:
* To decrease the amount of meat in our diet, I also have made the filling with a combination of ground meat and textured vegetable protein, or TVP. For this recipe, I use 2/3 pound (0.67 pound) ground meat and 1/2 cup dried TVP (available in the bulk section of a health food store and in small packages at some supermarkets). The TVP I buy looks a little like coarse panko crumbs. To reconstitute the TVP, pour 1/2 cup water into a 1 cup glass measuring cup, place the cup in a microwave and bring to a boil. When the water boils, remove the cup from the microwave, stir in the 1/2 cup TVP and cover. When the onions are nearly done, stir in the TVP and allow to cook a minute or two, then add the rest of the ingredients.
** To make this dish wheat free, use a soy sauce that does not include wheat as an ingredient.
*** I use cooked carrot left over from another meal. If there is no cooked carrot, use 1 cup shredded or julienned raw carrot. It can be added to the onion about a minute before returning the cooked meat to the pan or stirred in last, depending on whether you want the carrot cooked at all. If you don't like carrot, you could use an 8 ounce can of water chestnuts (finely diced) or some chopped bamboo shoots.
Subscribe to:
Posts (Atom)


 Posts
Posts


