Showing posts with label Easy. Show all posts

Thursday, December 30, 2010

Spinach Bacon Quiche


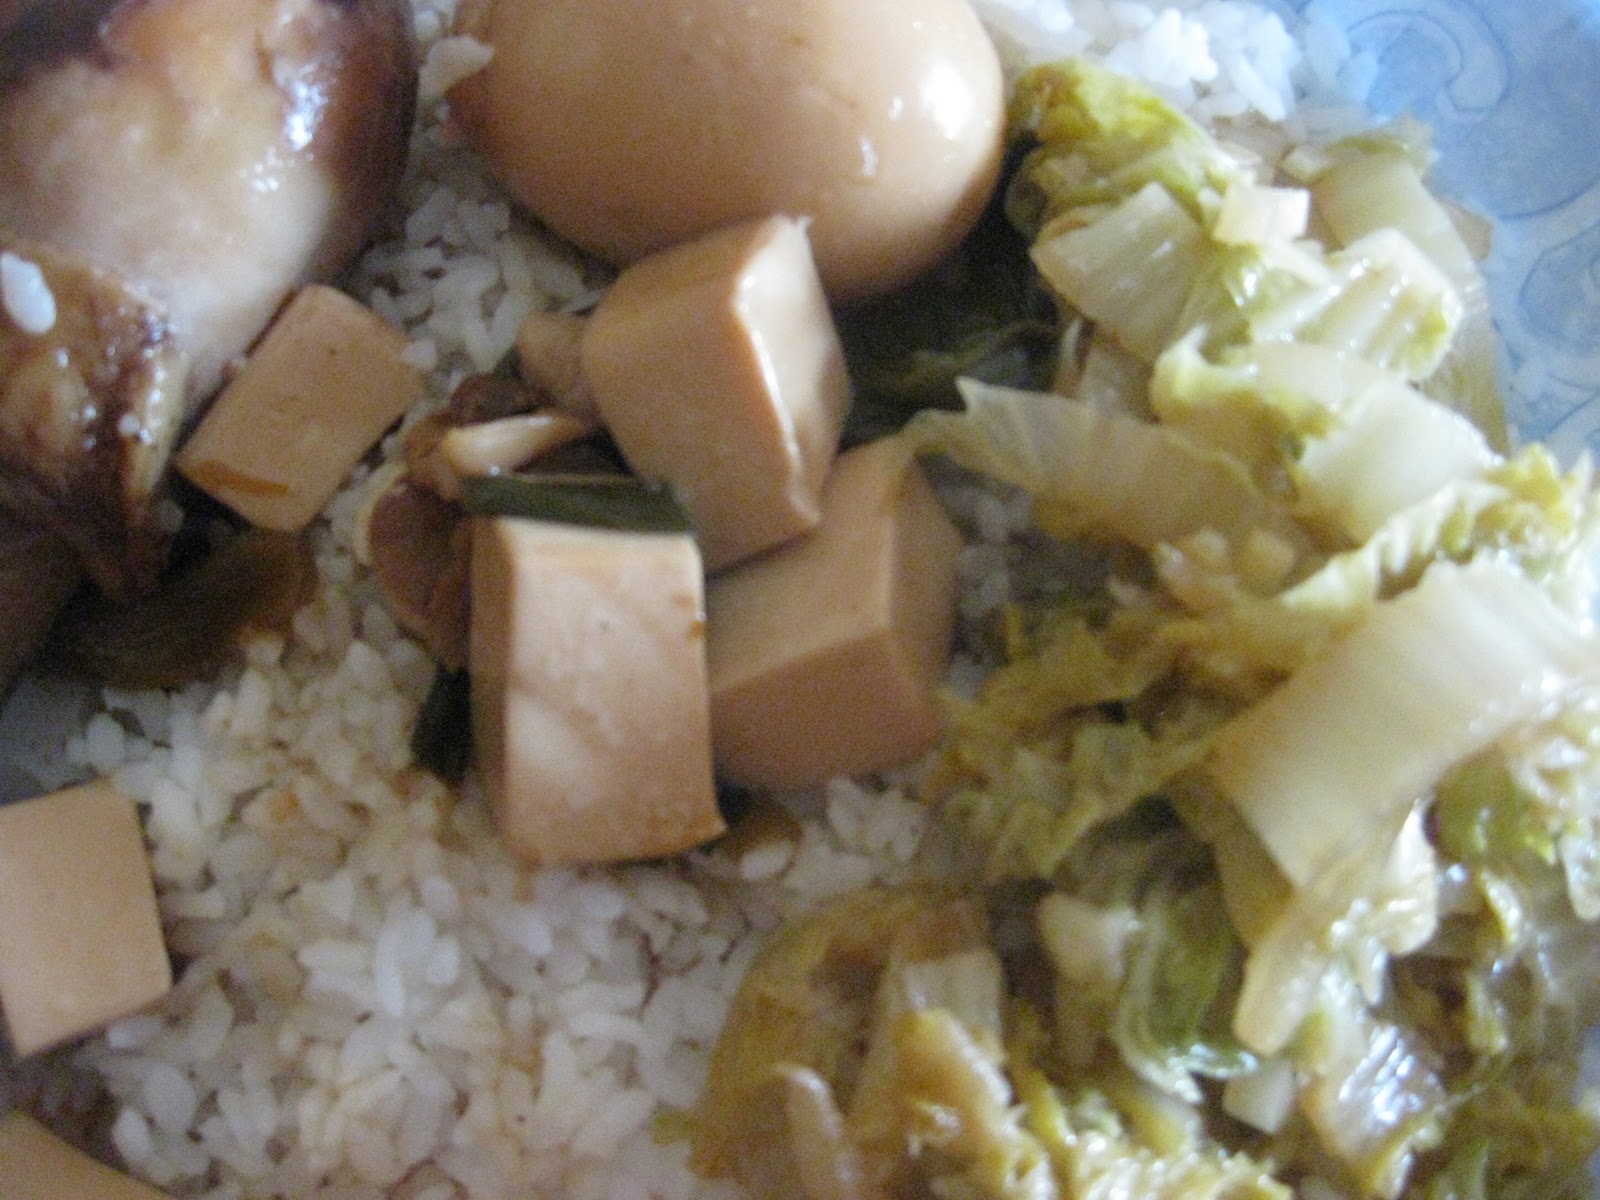
I love eggs in just about any form, so it's inevitable that they show up on my table at all times of day. It doesn't hurt that they are so easy to prepare, which is a nice break from some of the other cooking projects I've had during the holidays. Sometimes I make bacon, egg and cheese sandwiches. Sometimes I have soy sauce eggs with rice or noodles. And then sometimes I bake quiche.

The first time I tasted quiche was in my seventh grade French class. Our teacher, Mrs. D, wanted us to absorb some culture as well as conjugations. She perched a beret over her curly auburn hair (it was clichéd even back then, although adorable on Mrs. D), read French poetry, played French records (so help me, I'll slap anyone who asks me what records are), and brought in Evian water and Brie cheese (they were exotic at the time). She also fed us quiche.

Since then, quiches have become hip, then passe, and now ... I don't know what their current status is, and I don't care. Just let me have the eggy, custardy, cheesy filling in a buttery crust. Did I mention the bacon? I'll be quiet for the two minutes it takes to inhale my share.


Ham and cheese quiche with broccoflower gratin and braised leek
A pre-made crust makes a quiche quick and easy. But since when do I do things the easy way if the hard way tastes better? For a while I've tried to master pie crust. Not because homemade is cheaper. It's sort of an obsession, my Dulcinea — the right combination of tender and flaky, not too crumbly, but not tough or too hard. Besides, I like the taste of butter, and pre-made crusts are made with vegetable shortening. I don't like shortening. It tends to leave a thin film throughout my mouth that I find unpleasant.

I've made some pretty good crusts, but I'm still experimenting. A recipe that I've been tinkering with for several months replaces one-third of the butter with olive oil (see recipe below). The olive oil helps coat the flour for a more tender crust. It's also more healthful, not that I'm afraid of a little butter or cream, as you can see from the quiche ingredients.

The vodka adds moisture to the dough without helping the gluten form. Gluten, which forms when water mixes with wheat flour, means structure, but it can also contribute to toughness. The vodka wasn't my innovation. A few years ago, Cook's Illustrated published a vodka pie dough recipe that attracted a lot of attention. For me, that dough was a little too wet and sticky to work with. But the idea of using vodka was good, so I incorporated that into my own crust.

Spinach-Bacon Quiche Recipe
Serves 4 adults

INGREDIENTS
1 crust (recipe below)
1 cup shredded cheese (I like to use a combination of cheddar and swiss)
1 package (10 ounces) of frozen chopped spinach, drained*
4 to 5 slices of cooked bacon, crumbled (or 1/2 cup chopped ham)
6 large eggs**
1/2 cup heavy cream (or creme fraiche)
1 cup milk
1/2 teaspoon salt
1/2 teaspoon freshly ground pepper

DIRECTIONS
1. Preheat oven to 425 degrees F. Bake crust (recipe below).

2. While crust is baking, cook spinach, then squeeze out liquid. After removing crust from oven, immediately sprinkle half  to two-thirds of the shredded cheese all over the bottom of the crust and allow to cool on rack. Lower oven to 375 degrees F.
With fingers, break up the spinach and sprinkle it evenly all over the bottom of the crust. Drop bacon pieces evenly over the spinach, then the rest of the shredded cheese.

3. In a 4-cup measuring cup or in a mixing bowl, beat eggs. Add cream, milk, salt and pepper, and beat until combined. Pour mixture into the crust, taking care not to overfill. Depending on the size of the pie dish, you may have extra filling.

4. Place quiche on a baking sheet, then bake until center barely sets, about 40 to 50 minutes (adjust time depending on the oven). Serve with salad, soup or cooked vegetable. We recently had spinach-bacon quiche with leftover potato gratin and ham and cheese quiche with broccoflower gratin.

Use ham instead of bacon if that's what you have.
NOTES: *I've used cooked fresh spinach with good results. If you don't like spinach, omit the spinach and make a bacon and cheese quiche. Or you could do ham and swiss, smoked salmon and chopped fresh dill, or any other filling combination.

**Leave out a couple yolks to reduce the cholesterol.

Pie crust recipe for quiche
makes a 9-inch deep-dish bottom crust

INGREDIENTS
2 cups all purpose flour*** (275 grams, or a shade under 9 3/4 ounces)
1/2 teaspoon salt
1 stick (1/2 cup, or 4 ounces) butter, very cold, cut into half-inch cubes
1/4 cup olive oil
5 to 7 Tablespoons ice water (5 Tablespoons worked for me)
1 Tablespoon vodka
1 teaspoon vinegar

DIRECTIONS
1. Put flour and salt in bowl of food processor and pulse to combine. Add half the butter and all the olive oil, and pulse until the butter pieces resemble sand. Scrape down sides of processor bowl if needed. Add remaining butter and process until the butter pieces are about the size of peas. (If you don't have a processor, use your fingers or a pastry cutter to work butter into the flour.)

2. Dump contents of processor into a large (4.5 quart or 5 quart) mixing bowl. Put 5 Tablespoons of the ice water together with the vodka and vinegar in a cup. Using a fork, stir the liquid into the dough until it clumps. Give it a squeeze with a clean hand. If dough crumbles instead of holding together, add water, half Tablespoon at a time. If it holds together, shape into a disk, wrap in plastic and refrigerate at least 30 minutes.

3. After dough has rested, roll out and fit into a 9-inch deep-dish pie plate or a 9- or 10-inch quiche dish. Avoid stretching the dough while placing it in the pie plate or it will be more susceptible to shrinkage. Trim dough about 1/4 inch outside the edge of the pie plate. (I usually have enough extra dough from the trimmings to make a toaster pastry.) Then crimp the edges. Poke bottom with a fork and place in freezer 30 minutes.

4. With the rack in lower third of the oven, preheat oven to 425 degrees F. Bake crust until it turns golden, about 25 minutes. You may have to cover the perimeter with a pie crust protector or foil while the bottom bakes through. If the bottom starts to balloon up, pierce with the tines of a fork and use the back of the fork to press the bottom back down. (I haven't had this problem lately, but it could be just luck. If you want, you can line the crust with buttered foil weighed down with pie weights or dried beans for about the first 15 minutes.)

5. Remove crust from oven and set on a rack.

NOTES: ***I use King Arthur unbleached all purpose flour, which is available at my supermarket. There are other good flours, but if the protein content is different, they may require different amounts of liquid. I recommend weighing ingredients for baking, although I know it isn't always possible or convenient. If using cups to measure flour, I fluff the flour then spoon it into the measuring cup before leveling it with a straight edge, such as a knife.

Tuesday, November 2, 2010

Easy Peasy Split Pea Soup

Soups are a good way to use leftovers and prevent waste.

 Coincidentally, Tara Parker-Pope in The New York Times writes about wasting food just as I'm on a kick to use up leftovers instead of forgetting them.

Now that we have a preschool tuition to pay that we didn't last year, I've had to be much more conscious of our expenses, including groceries. It's easy to underestimate the cost of food, especially if you buy a little here and there throughout the week without keeping track. When you're paying attention, you realize how much the costs add up.

It isn't as though I suddenly realized wasting food was ... well, wasteful. I always peel and eat broccoli stalks, use celery leaves in a soup or stew, and cook beet greens and other veggie parts that some people throw away. I'm the only one in the house who'll eat toast made from the heel of a loaf, so I turn the ends into homemade breadcrumbs, which go into meatloaf that also incorporates leftover chopped spinach. Leftover sausage gets cut into small pieces and tossed with pasta, olive oil and broccoli rabe or beet greens. Even so, all too often I rediscover — too late — a forgotten container or a bunch of leeks in the vegetable drawer that have mushified. (Yes, I know it's not a real word, but it's a real problem.) It's easy to grab bunches of things that look amazing at the farmers market and then have no time that week to get to it all.

And that was usually my problem. I had no plan for many of my food purchases, and once they got stored at home — in the produce drawer, the pantry, etc. — it was "out of sight, out of mind." For the past couple weeks, I've been working harder on changing my habits, making sure to plan ahead what I'd prepare during the week and write my shopping list accordingly. If something I hadn't planned to buy was irresistible, I made sure to think what I'd make with it and when to do so. If something tempted me, but I couldn't think of what to make or when during the week I'd have time to get to it, then I resisted the urge to take it home.

Along those lines, I made a pea soup this past week, partly because the weather turned cold and partly because I had impulsively (old habits die hard) bought big bags of organic carrots and potatoes. Hey, they were on sale. I started out pretty well by prepping and roasting the potatoes and carrots the day I got them home. For me half the battle is not putting them in the bottom drawer of the refrigerator and losing track of them. That evening we had the veggies with roast chicken for dinner.

The next day we ate some of the leftover veggies. A couple days after that, I noticed the container of potatoes and carrots starting to migrate farther back into the fridge, getting ready to disappear behind a wall of yogurt containers.

Extra veggies can go into almost anything. I like to use them in pasta, omelets and quiches, and soups. A couple soups that take little effort and time are pumpkin-red lentil soup (to use up extra pureed pumpkin or other cooked squash) and split pea soup (to finish off potatoes, carrots and ham, if you eat meat).

Vegetarian Split Pea Soup
Serves 8

INGREDIENTS
1 Tablespoon olive oil
1 onion, chopped (about half to three-quarters of a cup)
2 small cloves or 1 large clove garlic, chopped (about a Tablespoon)
pinch of salt
1 bag dried split peas (1 pound, or about 2 cups)
2 quarts (8 cups) vegetable stock*
leftover cooked carrots (I had about a cup, but more or less doesn't matter)
leftover roasted potatoes (again, as much as you have or want)
salt

DIRECTIONS
1. In a medium (about 4 quart) pot over medium heat, stir together oil, onion, garlic and pinch of salt, and cook, stirring occasionally, until the onion turns translucent. Lower heat if it starts to brown or burn.

2. Inspect peas, discarding any stones or bad-looking peas. Put peas and broth into the pot of onion, bring to a simmer over high heat, then reduce heat and continue to simmer until peas break down and become soft, about 45 minutes.** Add carrots and potatoes, and heat about 5 minutes more. Taste and add salt and pepper if needed.***
 
NOTES:
* Normally I'd use water and simmer the soup with a ham hock or pieces of leftover ham, but when I don't have ham or just want a vegetarian version, I like to use vegetable stock or broth for the flavor. Use vegetable scraps to make broth and freeze ahead of time. I also keep on hand vegetable bouillon cubes. Chicken broth makes a good substitute if you aren't vegetarian or vegan.
** I think most recipes call for half or all the soup to be blended with an immersion (stick) blender or in a traditional blender. I like my soups to have some texture, so usually I don't blend.
*** Other seasonings you could use include a teaspoon of chopped fresh thyme leaves added with the carrots and potatoes, or a bay leaf added with the broth, or a teaspoon of curry powder added to the onions about a minute before the broth and peas are added. Experiment with what you like. My roasted carrots often are tossed with lemon zest and a lemon vinaigrette after coming out of the oven. If I were using plain carrots, I'd probably also add a little lemon to the soup.

Thursday, October 21, 2010

Asian Lettuce Wraps


I love easy meals, and I love meals the kids will eat. I'd say lettuce wraps filled with this sweet and savory, barely tangy filling falls into both categories. I don't have time to nag anyone to eat, and I hate - really hate - to toss perfectly good food in the garbage. An added bonus is this recipe is budget and health conscious, especially when some of the meat is replaced with textured vegetable protein.

Thank goodness this meal comes together for me every time (including today). It's been a rather accident-prone week and a half. I've been dividing my attention among the kids, some work, cooking, etc., and the lack of focus resulted in some newbie disasters. An apple tart Tatin that I've made for years just wouldn't work. I burned the caramel on the first tart. The second tart ended up under-caramelized. I burned my wrist on a hot pot. I'll spare you the entire list. I'd rather not talk about it now.

But this week is already going better. After all, Halloween - one of my favorite holidays - is around the corner and I've already gotten my skull lights out and set up. And tonight's dinner is done.

RECIPE
Asian Lettuce Wraps
Serves 4-6

INGREDIENTS
1 Tablespoon oil (canola or peanut)
1 teaspoon sesame oil
2 teaspoons grated fresh ginger
1 1/4 pounds to 1 1/2 pounds ground turkey (or beef)*

1 Tablespoon oil
1/2 medium onion or 1 shallot, chopped
5 medium or 3 large cloves garlic, chopped

2 Tablespoons brown sugar
2 Tablespoons low sodium soy sauce**
1 Tablespoon fish sauce (I use Three Crabs brand)
1 teaspoon sriracha sauce
1 teaspoon rice wine vinegar
2 or 3 scallions, chopped
1 cup cooked carrot, diced***

8 to 12 lettuce leaves (Boston and red leaf lettuce work well)
garnish: mint or Thai basil leaves and lime wedges to squeeze over filling

DIRECTIONS
1. Heat 1 tablespoon oil in a deep 12-inch skillet or wok over medium-high heat, add ginger and ground meat, and cook until just done. Remove meat to a bowl and cover to keep warm. Return pan to stove, reducing heat to medium-low.

Add onions to pan, then make sauce.
2. Heat the other tablespoon of oil, add onions, and cook for 1 minute. Add the garlic, and keep cooking until onions start to turn translucent. While onions and garlic are sweating, combine sugar, soy sauce, fish sauce, sriracha and vinegar. When onions and garlic are translucent (they can just be starting to turn golden at the edges), add sauce, scallions, carrot and cooked meat to pan. Stir until sauce is thoroughly mixed throughout meat. Remove from heat.

Thai basil has a slight anise flavor.
Serve ground meat together with mint or Thai basil wrapped in Boston or red-leaf lettuce leaves, two per person. It also is good served with a salad of napa cabbage or a bowl of mai fun (rice stick) noodles.

NOTES:
* To decrease the amount of meat in our diet, I also have made the filling with a combination of ground meat and textured vegetable protein, or TVP. For this recipe, I use 2/3 pound (0.67 pound) ground meat and 1/2 cup dried TVP (available in the bulk section of a health food store and in small packages at some supermarkets). The TVP I buy looks a little like coarse panko crumbs. To reconstitute the TVP, pour 1/2 cup water into a 1 cup glass measuring cup, place the cup in a microwave and bring to a boil. When the water boils, remove the cup from the microwave, stir in the 1/2 cup TVP and cover. When the onions are nearly done, stir in the TVP and allow to cook a minute or two, then add the rest of the ingredients.
** To make this dish wheat free, use a soy sauce that does not include wheat as an ingredient.
*** I use cooked carrot left over from another meal. If there is no cooked carrot, use 1 cup shredded or julienned raw carrot. It can be added to the onion about a minute before returning the cooked meat to the pan or stirred in last, depending on whether you want the carrot cooked at all. If you don't like carrot, you could use an 8 ounce can of water chestnuts (finely diced) or some chopped bamboo shoots.

Wednesday, October 6, 2010

Posole, and a Little Sous Chef


Posole, a hominy and pork soup, uses inexpensive shoulder, or Boston butt.
Posted at 4:09 PM
This past weekend my 3 year olds were sick — and crabby and irrational. And that's different, how? Oh, right. It's even more fun for their 7-year-old brother to rattle their cage. All. The. Time. Think "monkey house on Mountain Dew." The sun was shining, the air was crisp, and the universe had launched its plot to drive me mad. It was working.

As I started on a pork and hominy soup called posole, the kids tussled over a little car. Someone yelled in pain. I glanced over. No blood. Good. None of them normally cared about the car, but this particular afternoon two of them chased the car snatcher, yelling and knocking through the kitchen like Capital One barbarians. The moment I leaned into the fridge, someone rammed my backside, nearly planting my nose in the onions.

I snapped at the younger two as I chased them toward the basement. "You're going to play downstairs and be happy, right now!" To big brother, I ordered, "You. You stay with me!"

"I'm bored!" my son whined immediately.

"Here, peel this onion," I blurted. I just knew he'd bicker and I'd lecture him ... But he accepted the two halves of the Vidalia, sat at the kitchen table and started pulling off the outer layer.

He wasn't arguing. He always argued ... to play the Wii, play his DS, watch Sponge Bob, avoid homework, delay bedtime, ... But he wasn't. We weren't.

"Here," I said as the band of tension around my shoulders loosened. "Have another one."

At the kitchen table, we fell into a rythm. I cut an onion lengthwise, he peeled the halves and handed them back, I chopped.

"What's this for?" he asked?

"I'm making posole, you know, that corn soup you asked about last week."

"All right!"

Like me, he gets stoked over Mexican food: homemade tamales, flaky empanadas or our little invention, taco nachos - hors d'oeuvre sized "tacos" made of tortilla scoops, taco filling and cheese. Recently he had asked for "that corn soup" — the cumin-flavored soup of pork shoulder and hominy that we had eaten a lot last winter.

We started chatting about little things, school and food. "Do you want to help cook?" I asked as I turned the heat on under my Dutch oven. "You can bring a chair to the stove."

"Yeah," he said, unusually engaged.

"Ok, first pour in the oil," I instructed, handing him the olive oil and a small measuring cup. "Then you can dump in the onions. Stir them a little until they get soft and more clear. And make sure you don't lean too close or your T-shirt'll catch fire."

I stayed at his right hand, ready to save him from immolation, but he worked carefully. He measured and added the seasonings and I put in the pork and broth before tucking the pot into the oven for a couple hours.

He asked if I was putting the soup into my blog. Sure, I planned to write about this. Could he do it too? Could he! When I helped him start his blog, I'd been hoping he'd practice a little writing instead of playing with the Wii so much.

He spent the next half hour or so putting thoughts into words, checking spelling with me, asking if I could help load a picture into his blog.

I didn't need the soup to warm me inside.


The posole that we made Sunday includes apple, the tarter the better. It won't be too fruity. The apple dissolves into the soup. You could also try adding a strip of orange peel (remove the pith, which is the white fleshy part). If you have time you could use dried posole in place of the ready-to-use canned hominy. My son and his siblings happily emptied their bowls, no argument.

Posole Recipe
Pork Shoulder and Hominy Soup
Serves 4 to 6

INGREDIENTS
1/4 cup olive oil (or canola or corn oil)
2 onions, chopped
3 large cloves garlic, smashed with side of knife
1 apple, roughly cubed or diced
1 Tablespoon dried oregano
1 Tablespoon chili powder
3 pounds pork shoulder (mine was cut as "country style ribs")*
1 quart (4 cups) low salt chicken broth (or homemade pork broth if you have it)

1 to 2 Tablespoons cumin
2 (15 ounce) cans hominy, rinsed and drained
salt and pepper

roasted pepper (poblano, jalapeno or bell pepper)

optional garnishes: cilantro sprigs, lime wedges, crispy tortilla chips or fried tortilla strips, shredded lettuce or shredded cheese, sliced avocado, roasted tomatillo salsa

DIRECTIONS

1. Preheat oven to 350 degrees Fahrenheit.
Add oil to Dutch oven over medium flame. Cook onions, garlic and apple over medium to medium-low heat until onions soften and turn translucent.
Add oregano and chili powder and stir into the onions. Cook one minute.

2. Season pork with salt and pepper, then add to pot. Pour in the chicken broth and bring to a simmer. Cover and place into the oven until pork easily pulls apart, about 2 hours.

3. Remove soup from oven, and let sit covered 30 minutes. Remove pork and pull apart with two forks or your fingers. Discard fat.**
Return pork to pot, stir in 1 Tablespoon cumin and the hominy. Taste. Add more cumin and salt and pepper if needed. Simmer covered, over low heat, for 20 minutes more.

Top with strips or pieces of roasted pepper. Also add other garnishes as desired.

NOTES:
Use leftover meat to make pulled-pork sandwiches.
* You can get two meals by cooking once if you use a larger package of meat than you need for soup. When I cook extra pork shoulder, I like to use the meat for pulled-pork and cucumber sandwiches or for a meat sauce to go with pasta.
** You can remove more fat from the soup by skimming the oil from the top before returning the meat to the pot. If you make the soup a day ahead, you also can refrigerate the soup separately from the meat and then spoon off the fat that collects on the top. When ready to serve, put the pork back into the soup, add the cumin, hominy and any needed salt and pepper and simmer.

Below: My son wanted to demonstrate mixing in the hominy.

Monday, September 27, 2010

Cheap Dinner: Soy Braised Chicken

Lu ji tui, or soy sauce cooked chicken legs, is a bargain meal.
Posted at 5:14 PM
Why did the cook cross the supermarket aisle? To get to the chicken calling, "Cheap, cheap!"

One of my supermarkets was selling drumsticks this morning (and still is) for 89 cents a pound, so I had a great reason to make one of my favorite comfort foods, lu ji tui, or soy braised chicken legs. Not counting the braising liquid, the per-serving cost of the meat came to 52 cents per adult serving, and 26 cents per child. That's cheaper than a single fast food chicken nugget, plus tastier and lower in fat, too.

If you make soy sauce eggs and tofu (recipes below) with the leftover braising liquid, you can stretch out the meal into even more servings.

What I like about this dish is you basically dump everything into the pot and get a delicious result.
That's how my mother cooked this dish, and that's how I've been making it since I started cooking. Why mess with a good thing?
If you're a fan of oven braising, pressure cooking or slow cooking, by all means, try it your way and let me know how it turns out.

RECIPE
Soy Braised Chicken
Serves 6

INGREDIENTS
1 cup low sodium soy sauce
1 1/2 cups water
5 cloves garlic, smashed and paper (skins) discarded
5 scallions, cut into 2-inch pieces
1 Tablespoon fresh ginger, grated, or 1-inch piece sliced into coins
1 to 2 Tablespoons brown sugar or honey
1 teaspoon Chinese five spice
1 stick cinnamon (optional)
2 whole star anise (optional)
a strip of orange peel without the white pith (optional)

3.75 pounds chicken drumsticks (my package had 13 drumsticks)

DIRECTIONS
1. Combine everything but the scallions and chicken in a 4-quart pot or saucepan. Add drumsticks and scatter scallions over the top.

If needed, add 1/4 cup extra soy sauce plus 1/4 cup extra water to nearly submerge chicken pieces.

2. Bring to boil, then reduce heat to very low setting, cover and simmer until very tender, about one and a half hours. The meat pulls easily off the bone.

Serve with steamed rice, a vegetable such as long beans or bok choy, and soy sauce eggs and tofu (optional, recipes below). Drizzle chicken and rice with some braising liquid.

You can also take 1 cup of the braising liquid and reduce it by half for a more intensely flavored, slightly thicker sauce.

NOTE: You can cool the braising liquid, skim chicken fat from the top and freeze the liquid to use another time.
To cook a smaller package of chicken legs (usually 5 drumsticks or 4 thighs), halve the rest of the recipe and use a 2- to 3-quart pot.

RECIPE
Soy Sauce Eggs

INGREDIENTS
braising liquid from soy braised chicken
6 soft boiled eggs with shell removed

DIRECTIONS
Place braising liquid and eggs in a small (2 to 3 quart) sauce pan.
Bring to boil over high heat, then reduce flame to medium low and simmer uncovered 15 minutes. Remove from heat, cover and let sit 10 more minutes before serving, or let cool and store refrigerated in some braising liquid.

NOTE: If you want the flavor to penetrate more, you can prick the whites of the boiled eggs all over with the tines of a fork. Be aware that if you overdo it, the egg can fall apart.

RECIPE
Soy Sauce Braised Tofu

INGREDIENTS
braising liquid from soy braised chicken
1 block firm tofu (14 to 16 ounces)

DIRECTIONS
Cut tofu into 1/2-inch to 1-inch cubes and stir them into braising liquid from soy braised chicken. Bring to simmer and continue to braise for about 15 minutes or longer if desired.

NOTE: Soy sauce eggs and braised tofu can be cooked in the braising liquid together.

Saturday, August 28, 2010

Watermelon Strawberry Smoothie


When I was studying in Aix-en-Provence, France, there was a little hole in the wall called Crepes a Go Go where I'd regularly stop to pick up my lunch, usually an egg and spinach filled crepe with a smoothie on the side. What I liked best about it was that I could choose the fruit and they would take my chosen fruits, a whole kiwi or pear or peach, and peel and cut it right in front of me before tossing the pieces together with some strawberries and ice into a blender. It didn't get fresher or tastier than that.

For some reason, it took me several years to make my own smoothies. I don't know why. They were easy to throw together and I'd seen it done a hundred times. But I guess it just wasn't part of my repertoire until I got together with my now-husband. He was a runner who made his own smoothies, and suddenly something clicked. I decided I'd make my own blended drinks too.

The usual was simply banana with a little yogurt, soy milk and honey (plus sometimes a spoonful of protein powder). But whenever there was some extra fruit lying around, into the blender it would go, along with a few ice cubes and juice too.

Now I deliberately buy more fruit than we can eat right away so I can blend the extra into a drink.


Watermelon Strawberry Banana Smoothie
Serves 2 adults or up to 4 children

INGREDIENTS
1 cup frozen strawberries
1 cup frozen watermelon (watermelon cut into 1 inch pieces, then frozen)
 1 small banana
1 cup juice (any kind you like)
1 cup vanilla soy milk

DIRECTIONS
Place all ingredients into a blender and process until smooth. If mixture is too thick to blend, add a 1/4 cup to 1/2 cup more juice or soy milk.

Pour into glasses or cups and serve immediately

Wednesday, July 14, 2010

Dip-Snackin' Good Hummus Recipe

I still love dips, even if the Centers for Disease Control and Prevention warned us of the danger potentially lurking in salsa and guacamole, especially in restaurants.

I'll take a homemade salsa of roasted tomatillos, onions and other goodies any day. And don't even ask me about guacamole. I could support the California avocado industry single-handed.

But my new favorite is hummus. It works as a snack (a dip) and as a vegetarian entree (a filling for sandwiches or served with a salad). All three of my picky kids will eat it. I repeat: ALL THREE. KIDS.

I can't say the same for most other foods. My daughter loves avocados as I do. Her two brothers act as though it were slug slime. My hubby loves the tomatillo salsa. Kids, blech. I can't even get all three kids to be happy with grilled cheese sandwiches or macaroni and cheese all at the same time. I usually say, "You get what you get, and you don't get upset."

Occasionally I just want everyone to eat and be happy without my becoming a short order cook or setting up a big buffet or letting someone go hungry. That's when I throw together something they all like, such as Korean-style beef strips or Thai cucumber salad and hummus.

Chickpea Hummus

INGREDIENTS
2 (14 ounce) cans chickpeas (about 3 cups total)
3 tsp chopped garlic (or 5 cloves of roasted garlic)
2 tsp sesame oil*
juice of 1 lemon
1/2 tsp salt (taste and add more, if needed)
1/2 tsp freshly ground black pepper
1/2 cup extra virgin olive oil**

DIRECTIONS
Put chickpeas, garlic, sesame oil, lemon juice, salt and pepper in the bowl of a food processor and start to puree. With machine running, drizzle in olive oil until mixture is smooth. Stop machine and scrape down sides if needed.

Serve hummus with pita wedges, shredded-wheat crackers or chips, or spread hummus on soft, thin flatbread and roll to eat.

NOTES:
*Traditional hummus recipes use sesame tahini (paste), but I don't typically keep on hand a container of tahini, and I never want to run out to get it just for a small batch of hummus. I find that the sesame oil is a substitute that I really like.
**You could use water or chicken stock/broth instead of oil, if you want to lower the fat content the way my husband does, but I always use olive oil.
***Other things I frequently like to add to the recipe include a Tablespoon of chopped flat leaf parsley and a half teaspoon to a teaspoon of cumin. Another tasty addition would be some pureed roasted red bell pepper.

Wednesday, June 30, 2010

You Have One Hour, and Your Time Starts ... Now


Quick! You're invited to a barbecue at the last minute and you need to throw together a contribution. What to make? That's why it's always good to have a couple of quick crowd pleasers in your repertoire. Like an easy blueberry sour cream cake.

This one evolved from a raspberry buttermilk cake published last June in Gourmet (sigh, I do miss it).  I always have almonds in the cupboard, so here, instead of 1 cup of flour, I use 3/4 cup flour plus 1/4 cup ground almonds, and in place of the buttermilk I use sour cream (or plain Greek-style yogurt), because I never seem to have buttermilk just sitting around in the fridge. My hubby and I don't like our desserts extremely sweet, so I decreased the sugar to 1/2 cup (instead of the original 2/3 cup).

Also, the leavening in the original recipe seemed excessive for what amounts to 1 cup of flour, so I've cut the baking soda in half (down to 1/8 teaspoon). Cooking science experts, such as "Bakewise" author Shirley Corriher, say that too much leavening actually drives air out of the batter instead of giving a cake more lift. The adjustment seemed to work. My husband didn't know about my change to the recipe and commented that the cake turned out lighter.

Blueberry Sour Cream Cake

INGREDIENTS

3/4 cup flour plus 1/4 cup ground almonds* (OR just 1 cup all purpose flour)
1/2 teaspoon baking powder
1/8 teaspoon baking soda
1/2 teaspoon salt
1/2 stick (2 ounces) butter, softened
1/2 cup sugar
1 large egg
1 teaspoon vanilla
1/8 teaspoon almond extract (optional)
1/2 cup sour cream or Greek-style yogurt
1 heaping cup blueberries**
1 tablespoon sugar (any kind of sugar crystals, eg. regular white sugar or turbinado sugar)

DIRECTIONS

Before making the batter, place oven rack in the bottom third of oven*** and preheat to 400 F at least 15 minutes.
Generously butter and flour a 9-inch round cake pan (or spray nonstick cake pan with cooking spray) so that it will be ready when you need it.

1. In a medium bowl, mix together flour, ground almonds (if using), baking powder, baking soda and salt with a fork. This helps ensure you don't get a clump of baking powder or soda in one spot.

2. In a large mixing bowl, cream together butter and sugar, about 2 minutes, until fluffy. I use a medium speed of my hand-held electric mixer.

3. Add egg and extracts to butter, mixing well to combine.

4. Add about 1/3 dry ingredients into batter, mixing them in at low speed, then half of the sour cream. Mix in another third of the dry, followed by remaining sour cream. Mix in the rest of the dry ingredients just until combined.

5. Spread batter into prepared cake pan, and then arrange berries on top.
Sprinkle with 1 tablespoon sugar and bake at 400 F until golden brown and tester inserted in center comes out with no raw batter, about 25 minutes. (You may have to adjust the time depending on your oven.)

Let the cake cool in the pan for about 15 minutes. Run a knife between the cake and the side of the pan to
loosen the cake, place a plate on the pan and then invert it onto the plate. (This is the reason you need to generously butter and flour the pan ahead of time.) Remove the pan carefully, leaving the cake on the plate. Then invert the cake onto another plate so that it is right side up again.
Serve with fresh berries and whipped cream

NOTES:
*I really like using ground almonds (I whiz blanched slivered almonds in a food processor with a level tablespoon of sugar until they are ground relatively fine). But the original recipe used just 1 cup of all purpose flour (I like King Arthur Unbleached All Purpose), and it tasted very good that way too. If you don't use the ground almonds, you can add the tablespoon of sugar that would have been with the almonds to the creamed butter instead.

**The original recipe also called for 1 cup of raspberries, but I prefer 1 1/2 cups berries. I've also made the original recipe and this version with strawberries and pitted cherries, and all the variations were delicious.

***I like to preheat my oven (it's NOT convection) ideally for 20 to 30 minutes. I also keep a baking stone on the oven rack to preheat along with the oven and place the cake pan on the baking stone. This seems to help prevent the temperature from dropping drastically when I open the oven door to put the cake in. It also seems to keep the heat that hits the bottom of the baking pan more even.

I know this recipe by memory now, so it comes together super quickly for me (just under an hour from measuring ingredients to a slice on my plate). But I still set up the ingredients before getting started, and I place them in bowls on my counter (just like on TV cooking shows) in the order that I will be using them (a.k.a. mise en place). Not only does it let me zip through preparation quickly and easily, it makes me less likely to forget an ingredient. Yes, I've had a more than a few senior moments.

Friday, June 25, 2010

Cue the Cukes

I can't believe it's been a couple of months. We got sick after the week of birthdays and other doctors' and school district appointments that couldn't wait -- I was burned out. Then came the Disney vacation, then the recovery from vacation and getting kids who are home from school to occupy themselves with something other than a glowing, mind-melting TV screen.

But I promise I'll do better and offer the recipes soon for the cakes (they are sort of Frankenrecipes, so I have to pull them together to present them in a readable way).

Meanwhile, we've spent the past couple of weeks eating more healthful foods -- grilled chicken breast (satay style), small low-fat sirloin burgers and brats. Well, the brats aren't that healthful. But our overall diet is.

But my favorite dishes lately have been not the meats, but the sides -- peanut noodles, cellophane noodles, little quick carrot pickles and cucumber salad.

The cucumber salad is truly amazing. The cool freshness of the cukes accented by the zesty Southeast Asian-inspired dressing doesn't just taste great to me. My three children, all LOVE it, including one very picky nearly 3 year old who used to be fed via tube. I had made a batch after breakfast one day, and he came trotting into the kitchen for a bite, then back to his toys in the family room, then back for a bite ... His twin sister wouldn't leave my side and kept taking one after another. Within half an hour, the bowl was empty and I had to rethink our veggies for that night's dinner.

Tangy Cucumber Salad 2.0

INGREDIENTS
1 large seedless cucumber or 4 mini seedless cucumbers (about 14 to 16 ounces)

finely grated zest of half lime
juice from half lime (I get about 1/8 cup lime juice)
1 rounded tablespoon brown sugar
2 tablespoons fish sauce
2 tablespoons peanut oil (or canola oil)
1 tablespoon low sodium soy sauce
1 teaspoon grated fresh ginger (optional)
1/2 to 1 teaspoon sriracha (hot chili) sauce

garnish (to sprinkle over salad when serving): 1 to 2 tablespoons toasted chopped peanuts or black sesame seeds or chiffonaded thai basil

DIRECTIONS
1. Slice small cucumbers into coins or ovals (about 1/4 inch thick) or cut large cucumber in half lengthwise, then across into 1/4 inch thick half-moon pieces. Place slices in a colander over a bowl to drain 1/2 hour to 2 hours.

2. Combine remaining ingredients for dressing. Just before serving, toss cucumber with some of the dressing to coat slices. Don't dump all of the dressing at once. It can be a little strong for some people, and you can always add more if you want.

3. Sprinkle with preferred garnish, and eat immediately.

NOTE:
This salad does not keep well after the dressing is combined with the cucumbers. If preparing ahead of time, keep dressing and sliced cucumber in separate containers.

This recipe's success REQUIRES the fish sauce and some sort of chili sauce. I like Three Crabs brand fish sauce and Huy Fong sriracha, which I get at my local Asian grocer, but some supermarkets in my area do sell some sort of fish sauce and chili sauce in the Asian section of the international foods aisle. Those are the ingredients that MAKE the dressing. And put down the bottled lime juice -- step away from the little green plastic bottle.

This dish was inspired by another cucumber salad I used to make, which itself is an adaptation of a Sweet, Tart, and Spicy Shrimp and Cucumber Salad from Epicurious. It's a tad simpler, and uses less fish sauce for those who are intimidated by its rich flavor. But I recommend going for the version with more flavor, unless you REALLY are sensitive to the taste of fish sauce. Three Crabs brand is already pretty mild.

Cucumber Salad 1.0

INGREDIENTS
1 large seedless cucumber or 4 mini seedless cucumbers (about 14 to 16 ounces)

finely grated zest of half lime
juice from half lime
2 tablespoons brown sugar
1 tablespoon fish sauce
1 tablespoon peanut oil (or canola oil)
1/2 to 1 teaspoon sriracha sauce

 DIRECTIONS -- Same as for the other cucumber salad, minus the extra ingredients.

Friday, March 26, 2010

Pumpkin Red Lentil Soup

So much for spring. I wake up to the temperature below freezing and the windchill well below that.
I guess it's a hot soup day again.

One of my favorites is this pumpkin red lentil soup. My husband, when he was still my fiance, introduced me to a vegetarian version of this recipe that I've adjusted for my taste and whatever is on hand. That's what I love about this soup. It's so convenient and tweakable.

Make it with vegetable stock, chicken broth, coconut milk or a combination. Add grated carrot and ginger. Use roasted pumpkin, canned pumpkin, baked or poached butternut squash or frozen winter squash. Keep the seasoning simple with salt and pepper, add lemon zest, or spice it up with cumin or curry or hot pepper.  Top it with roasted pumpkin or acorn squash seeds, or freshly grated parmesan, or pan toasted bread crumbs or croutons. Serve it with a sandwich, or salad and bread, or build it up by adding some tubettini or orzo pasta to the pot. No matter what you do, it works and my three picky kids will eat it.

The fact that it's healthful is just gravy. There's lots of nutrition and fiber in the pumpkin puree and the lentils.


Roasted Pumpkin and Red Lentil Soup With Tubettini
Serves 8

INGREDIENTS
1/2 cup chopped celery
1/2 cup chopped onion or shallots
1 Tablespoon olive oil
1 clove garlic, smashed with flat of chefs knife
1/4 cup dry white wine (optional)
1 quart chicken or vegetable stock
8 oz. red lentils (1/2 pound), sorted and rinsed
1 14-oz. can pumpkin puree (or equivalent quantity roasted pumpkin or other squash)
1/2 cup tubettini pasta (optional)
Salt and pepper, to taste
Parmesan cheese (optional)

PREPARATION
1. Chop celery and onion and add to pot together with smashed garlic. Cook on medium-low until translucent, adjusting heat if necessary to avoid browning.

2. Stir in wine and stock and add lentils. Simmer until lentils are soft and break apart, about 30 minutes.

3. Add tubettini pasta and cook according to directions. Just before pasta is cooked, add pumpkin puree and stir to incorporate. Season to taste.

When serving, garnish with freshly shaved parmesan. Allow diners to grind their own pepper on top.

Notes:
* The "red" lentils I've used always start out an intense orange color, and become a golden yellow during cooking. They also break down much more than the French lentils I also use. That's all normal.

* I have used roasted pumpkin, and roasted butternut and acorn squashes in this recipe. But canned pumpkin is easy to keep on hand and allows you to throw this soup together very quickly. You can also use the precooked pureed winter squash available in the freezer section of the supermarket.

* I go light on the seasoning for my kids, but you can add a teaspoon or more of cumin or a sprig of thyme or cilantro (good with the coconut milk version of the soup), or warm it up with some cayenne or Chinese white pepper (the same kind that puts the heat in hot and sour soup). You can also add a splash of fresh-squeezed lemon juice to brighten it up.

* This recipe is easy to convert to vegan or gluten free. For a vegan version, use vegetable stock and skip Parmesan. For gluten-free soup, use gluten free pasta in place of tubettini.
Related Posts with Thumbnails